
ProtoMate for Pico
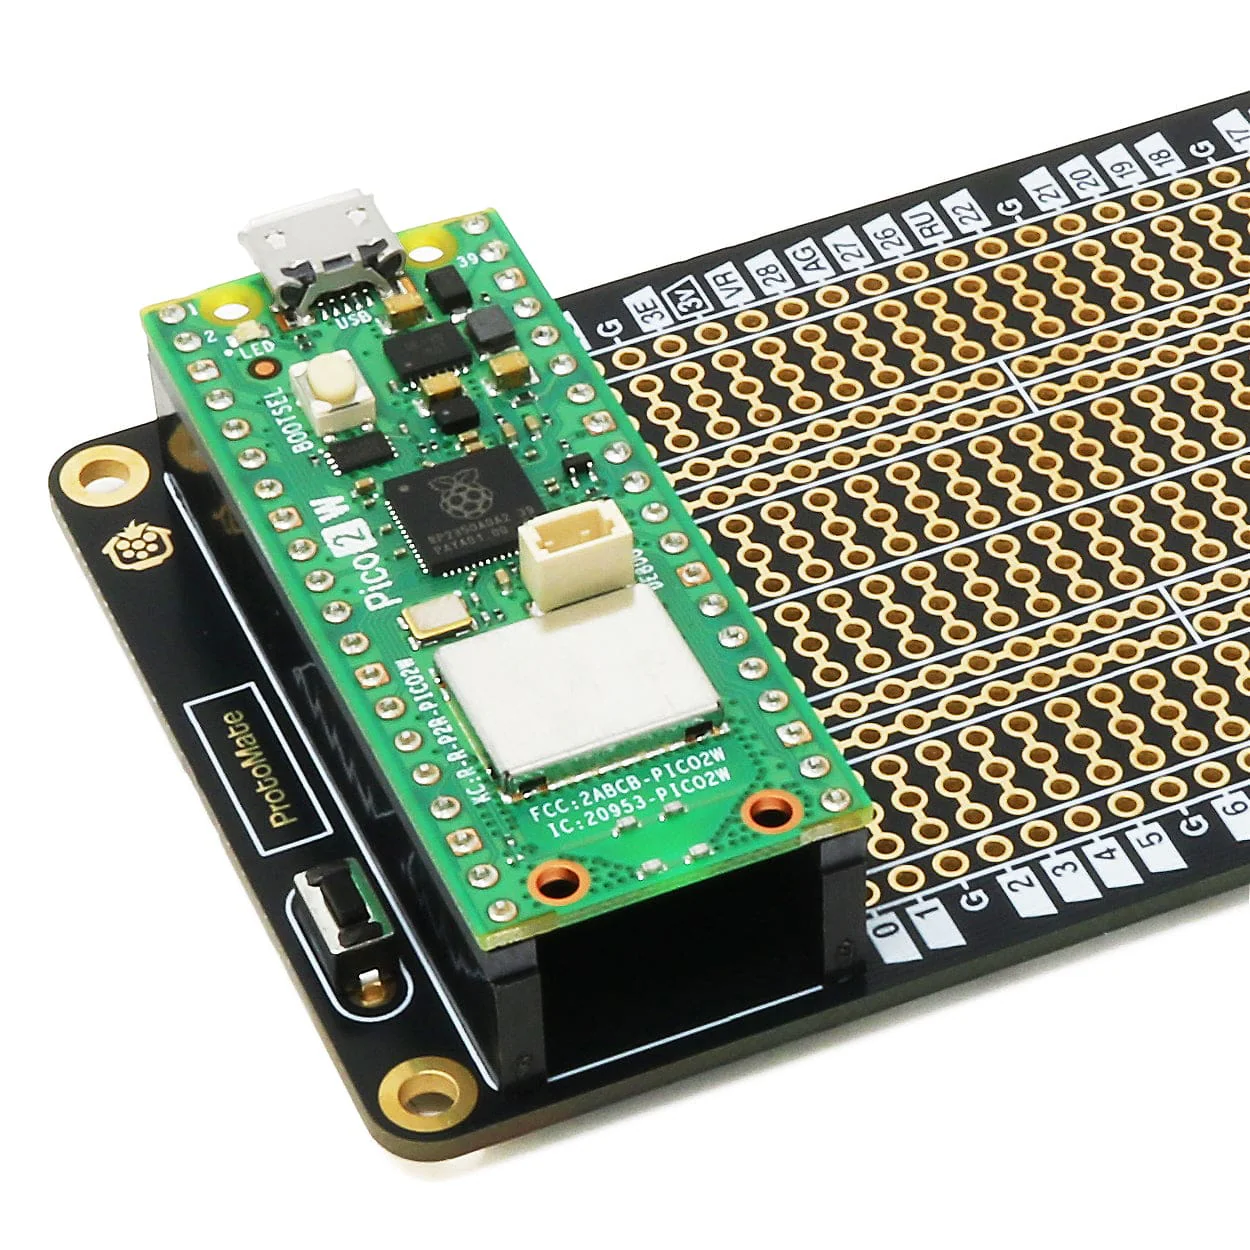
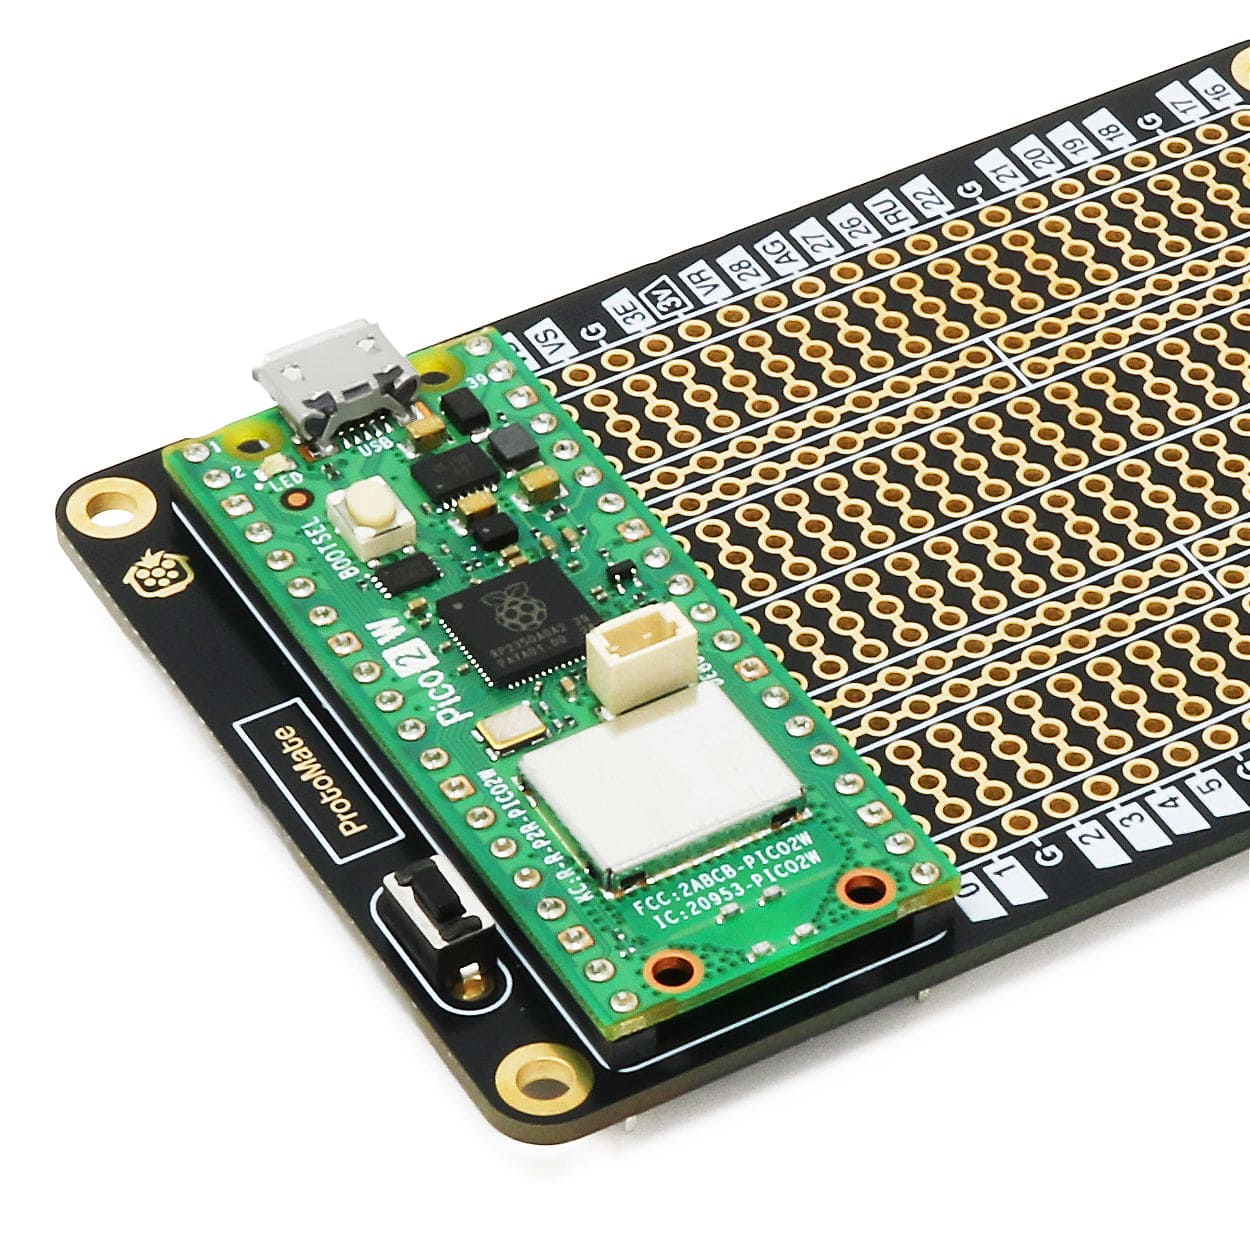
ProtoMate for Pico is a breadboard-style prototyping board designed for Raspberry Pi Pico (not included), designed to give you an easy way to make projects more permanent and reliable, moving from loose jumper wires and breadboards to a proper soldered PCB!
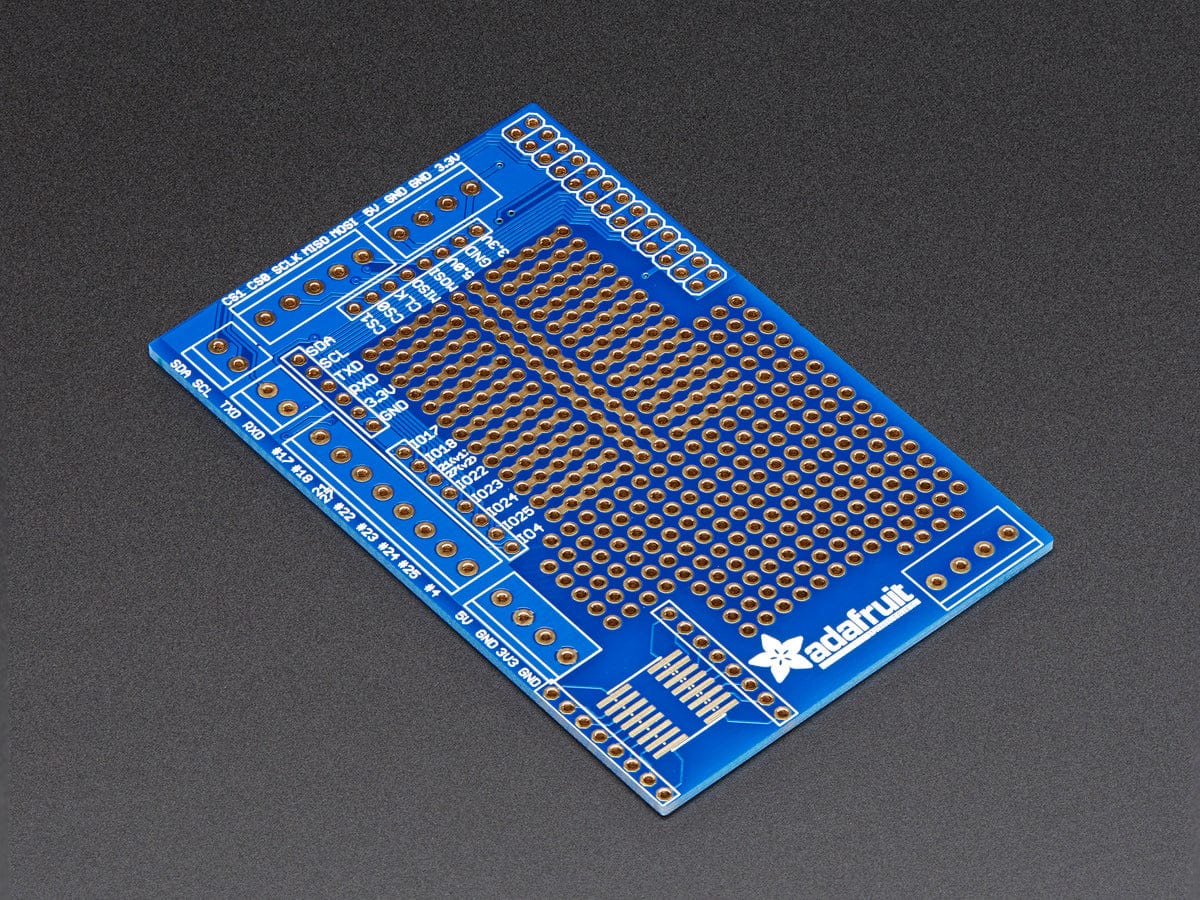
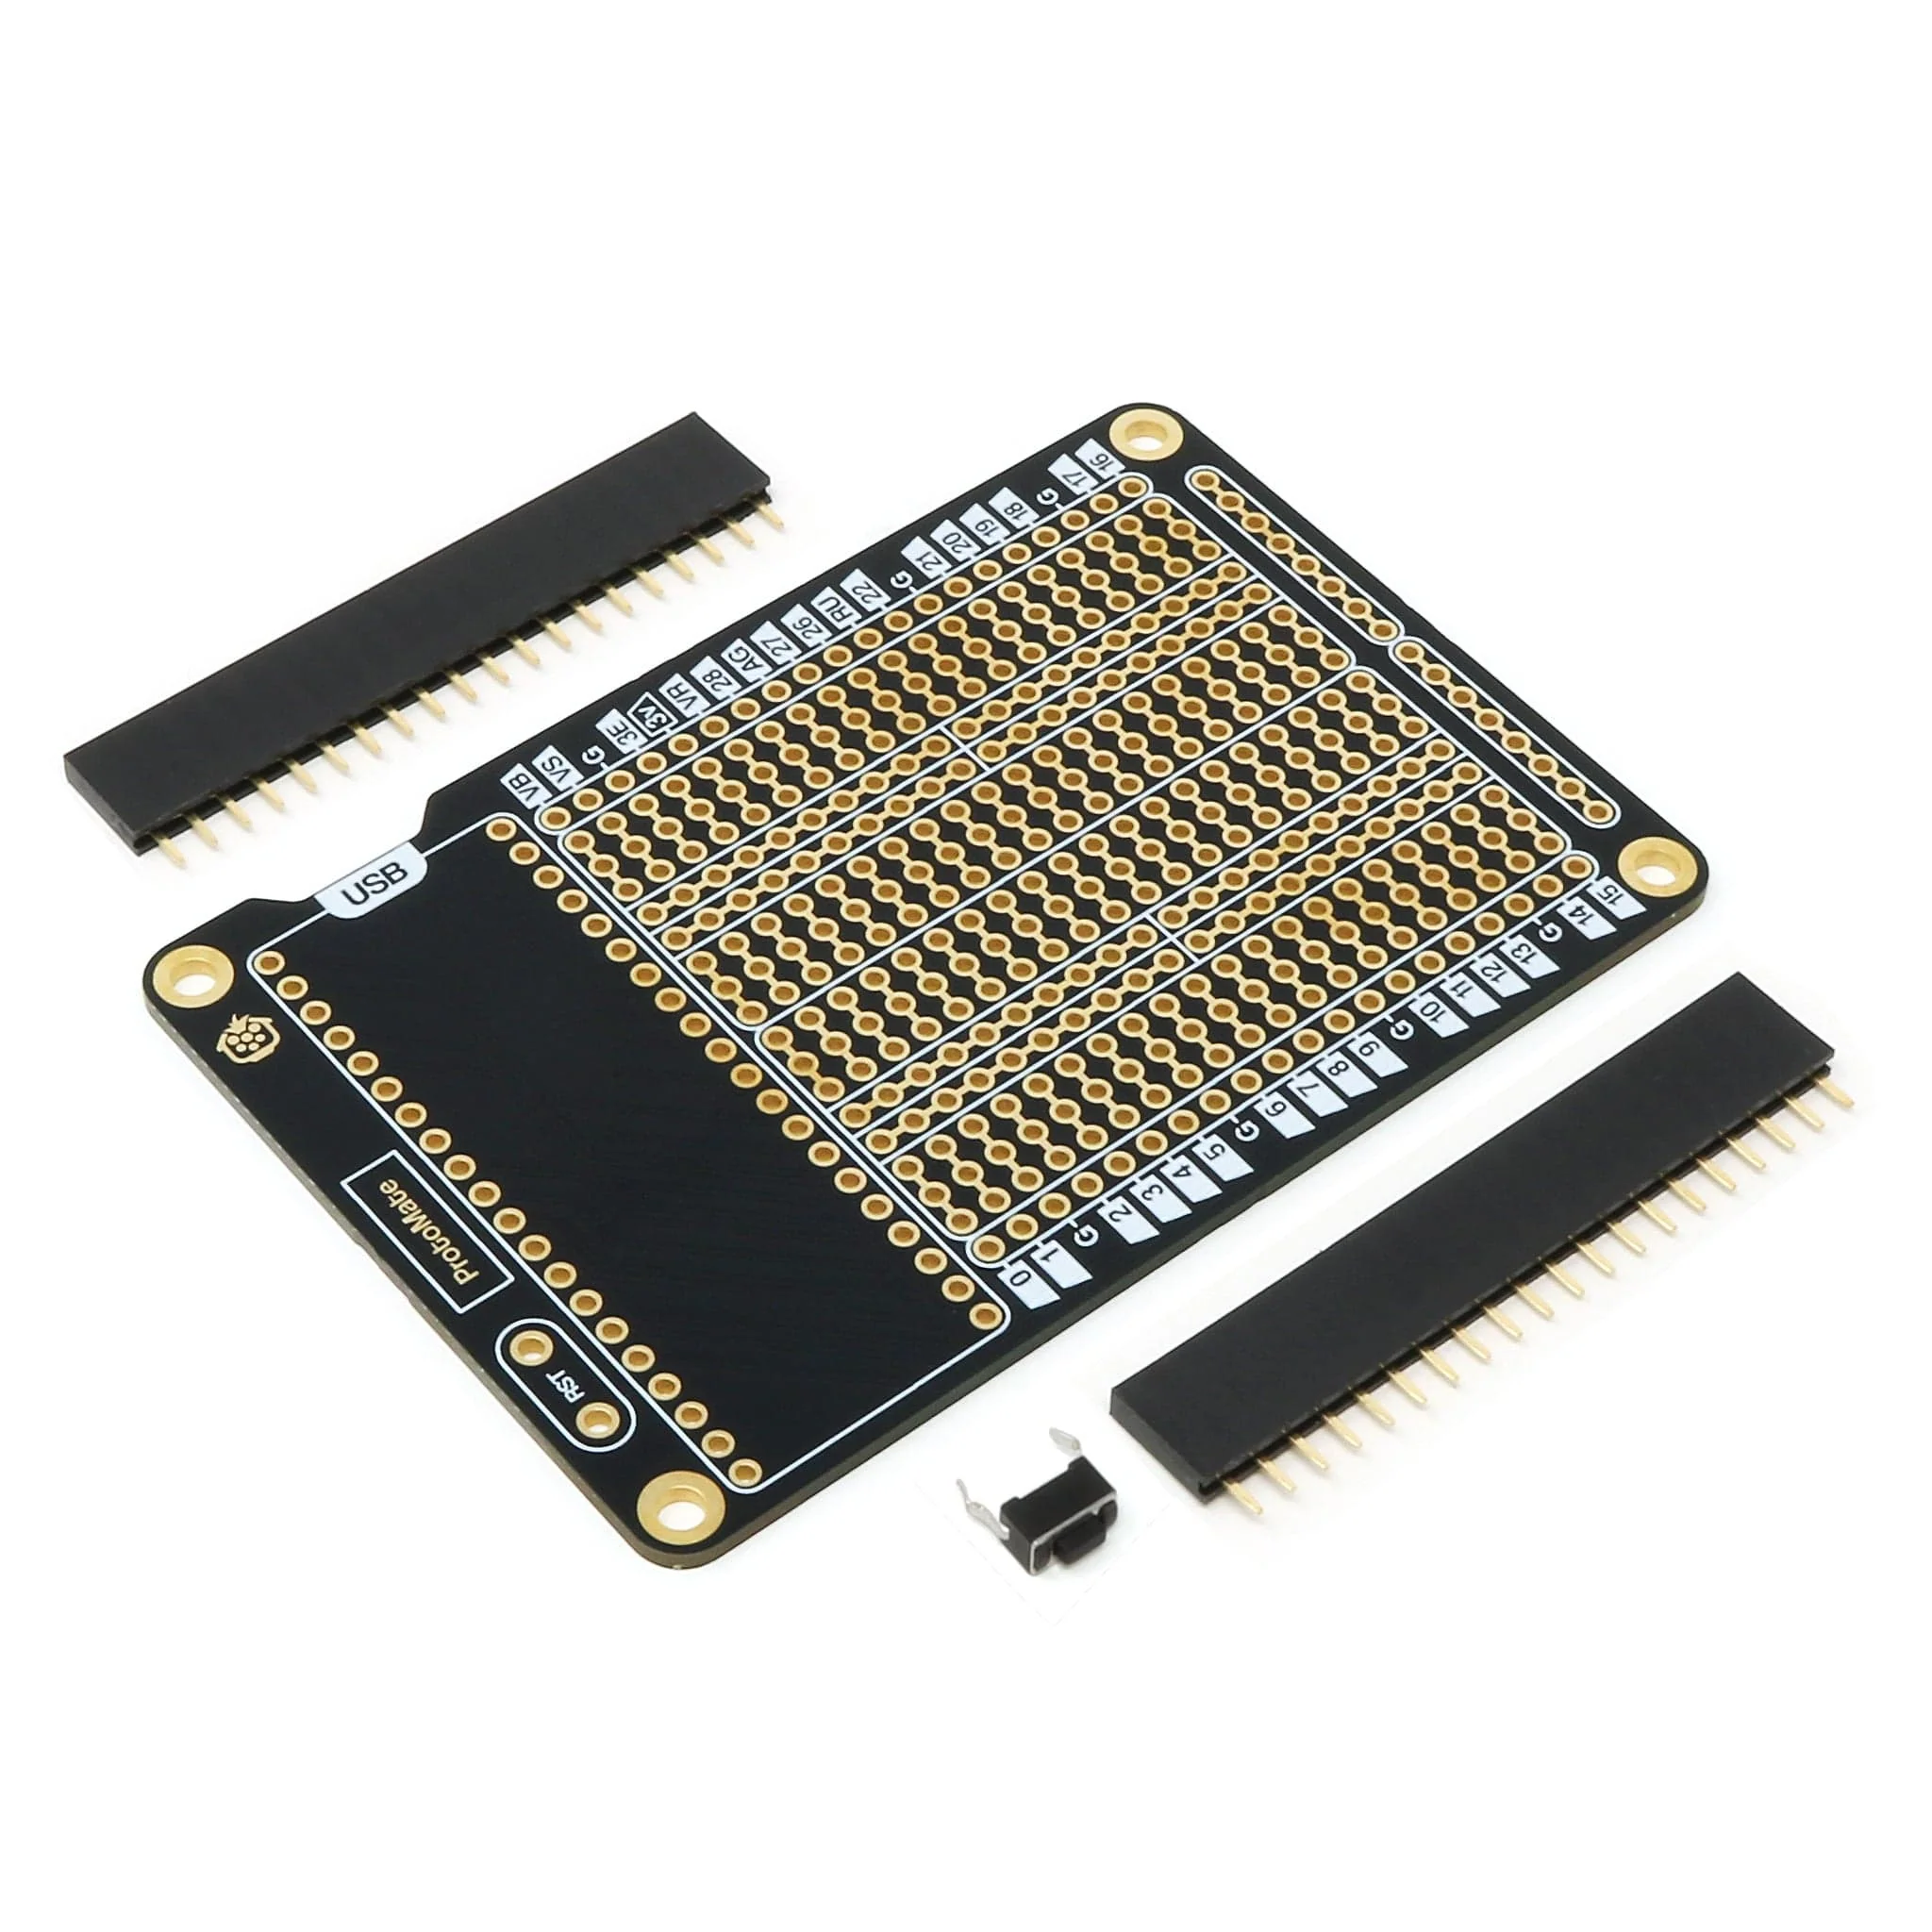
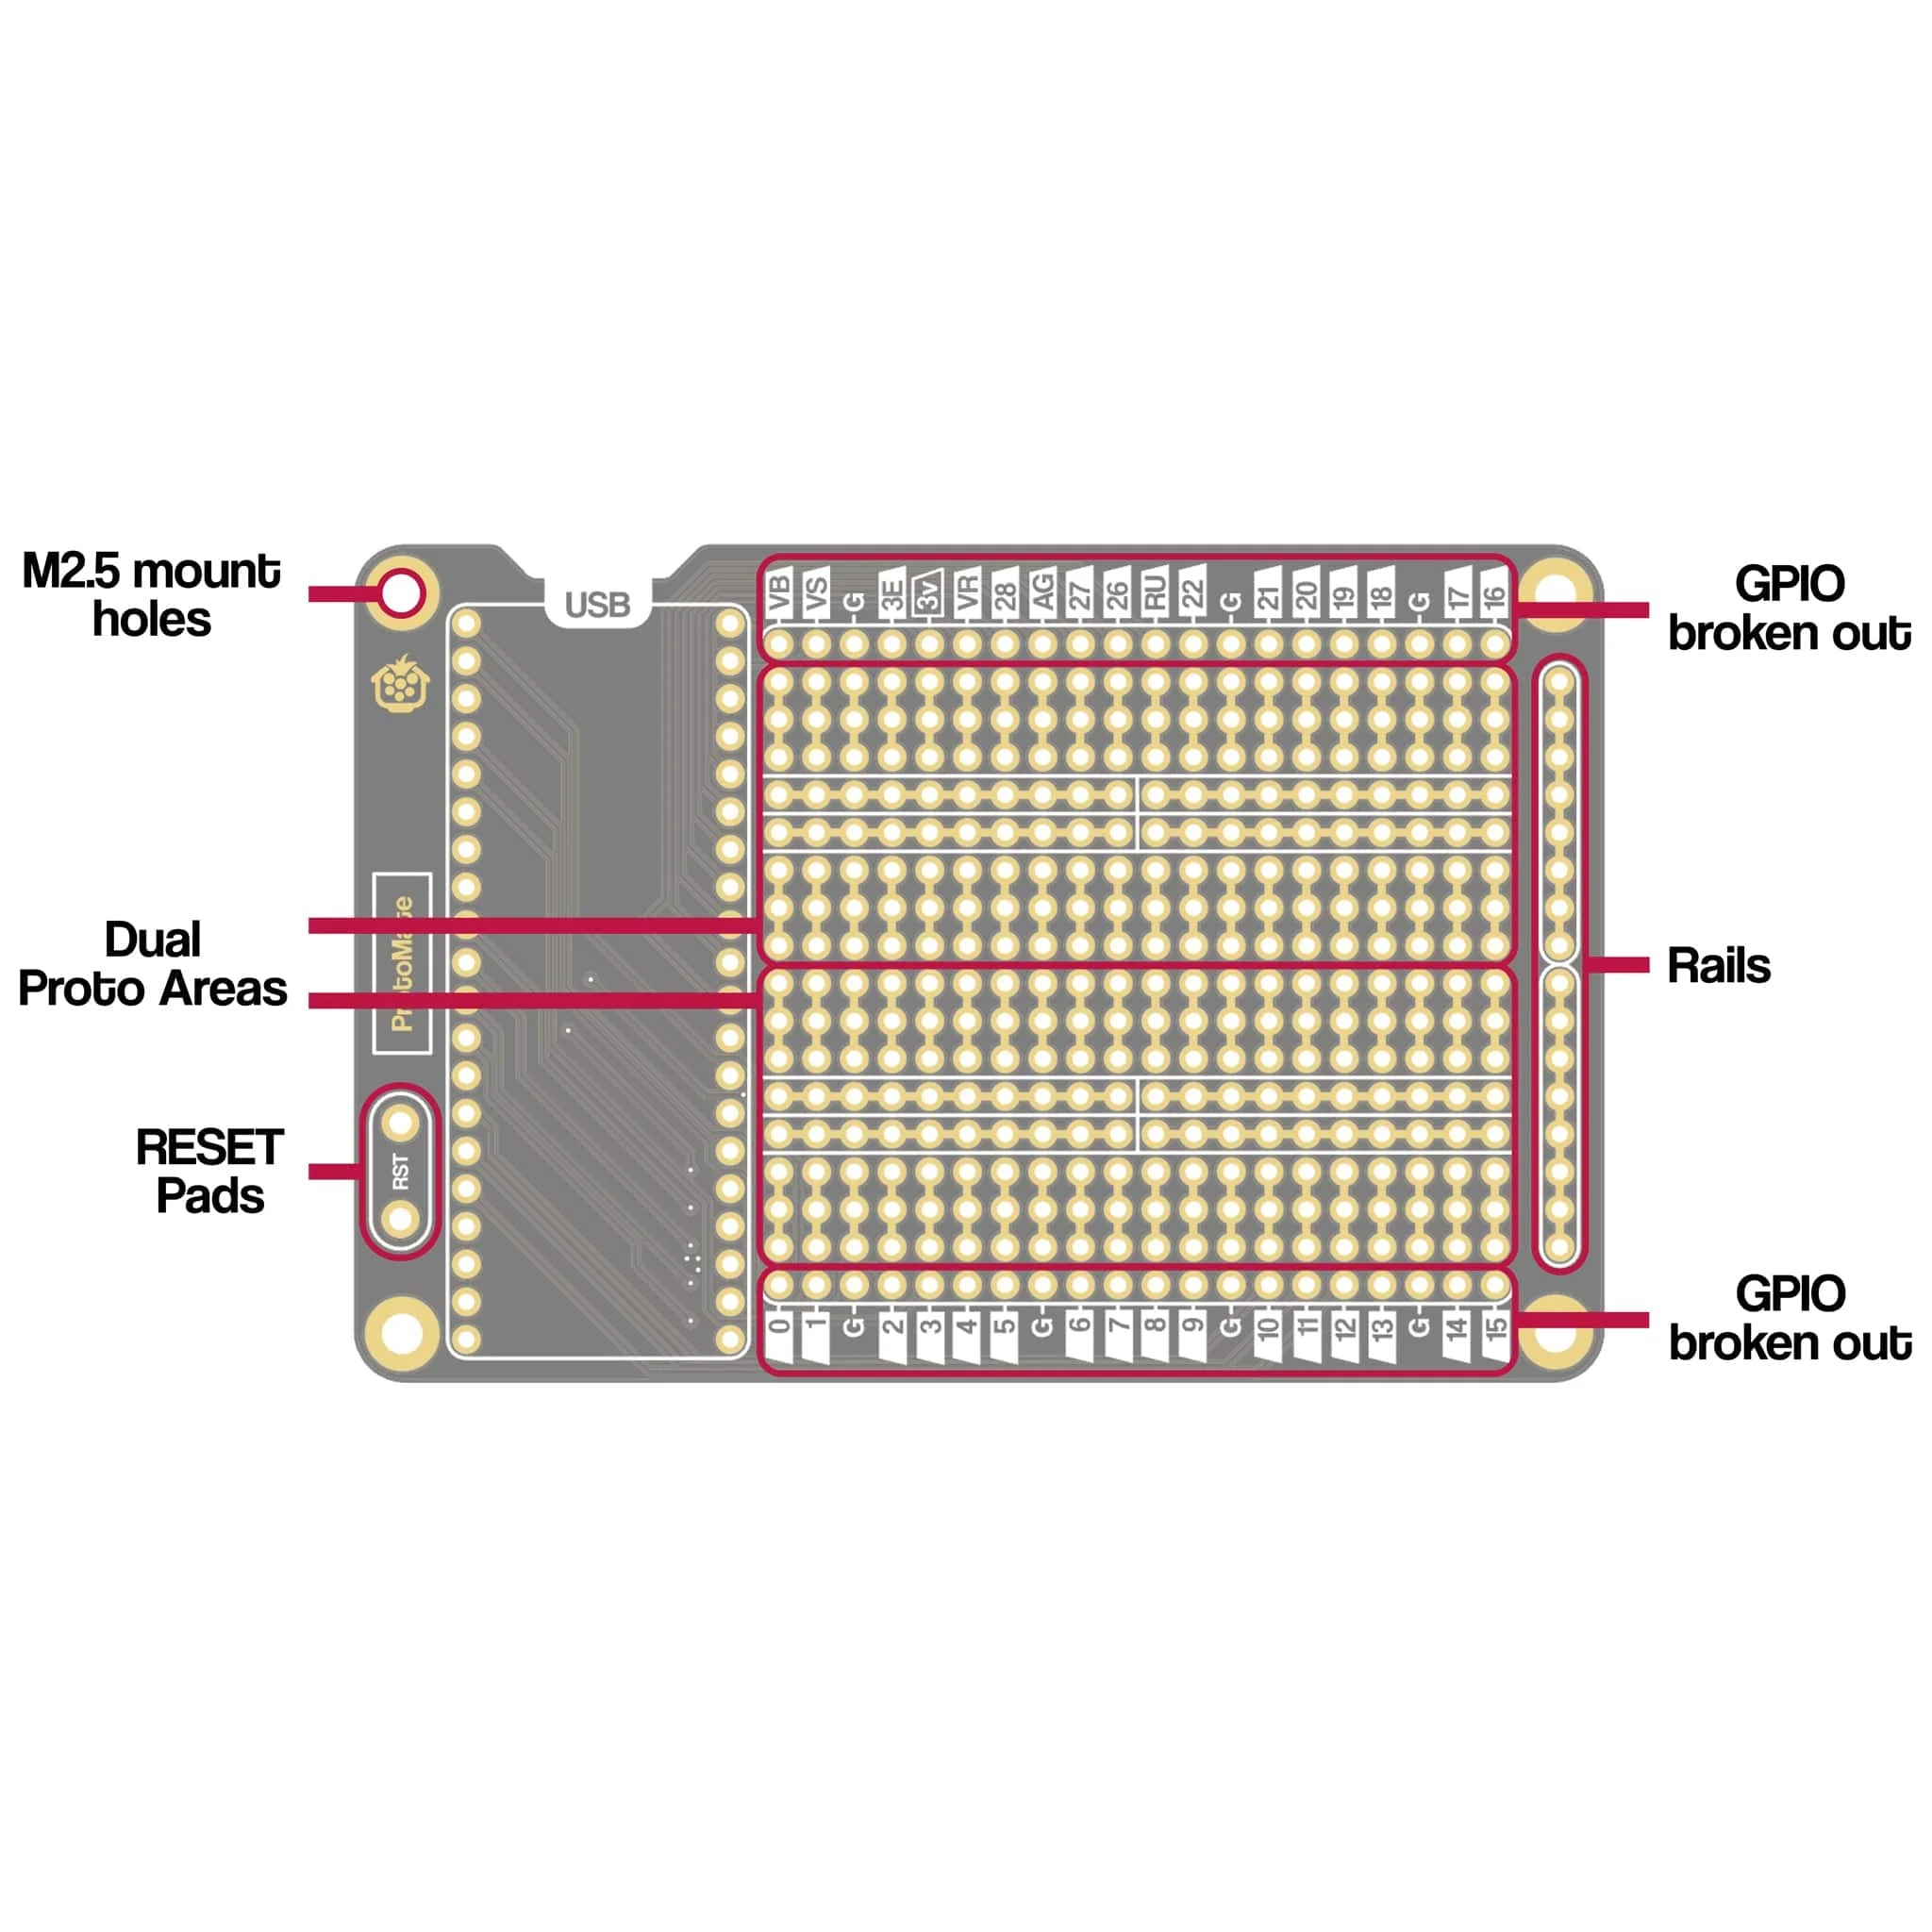
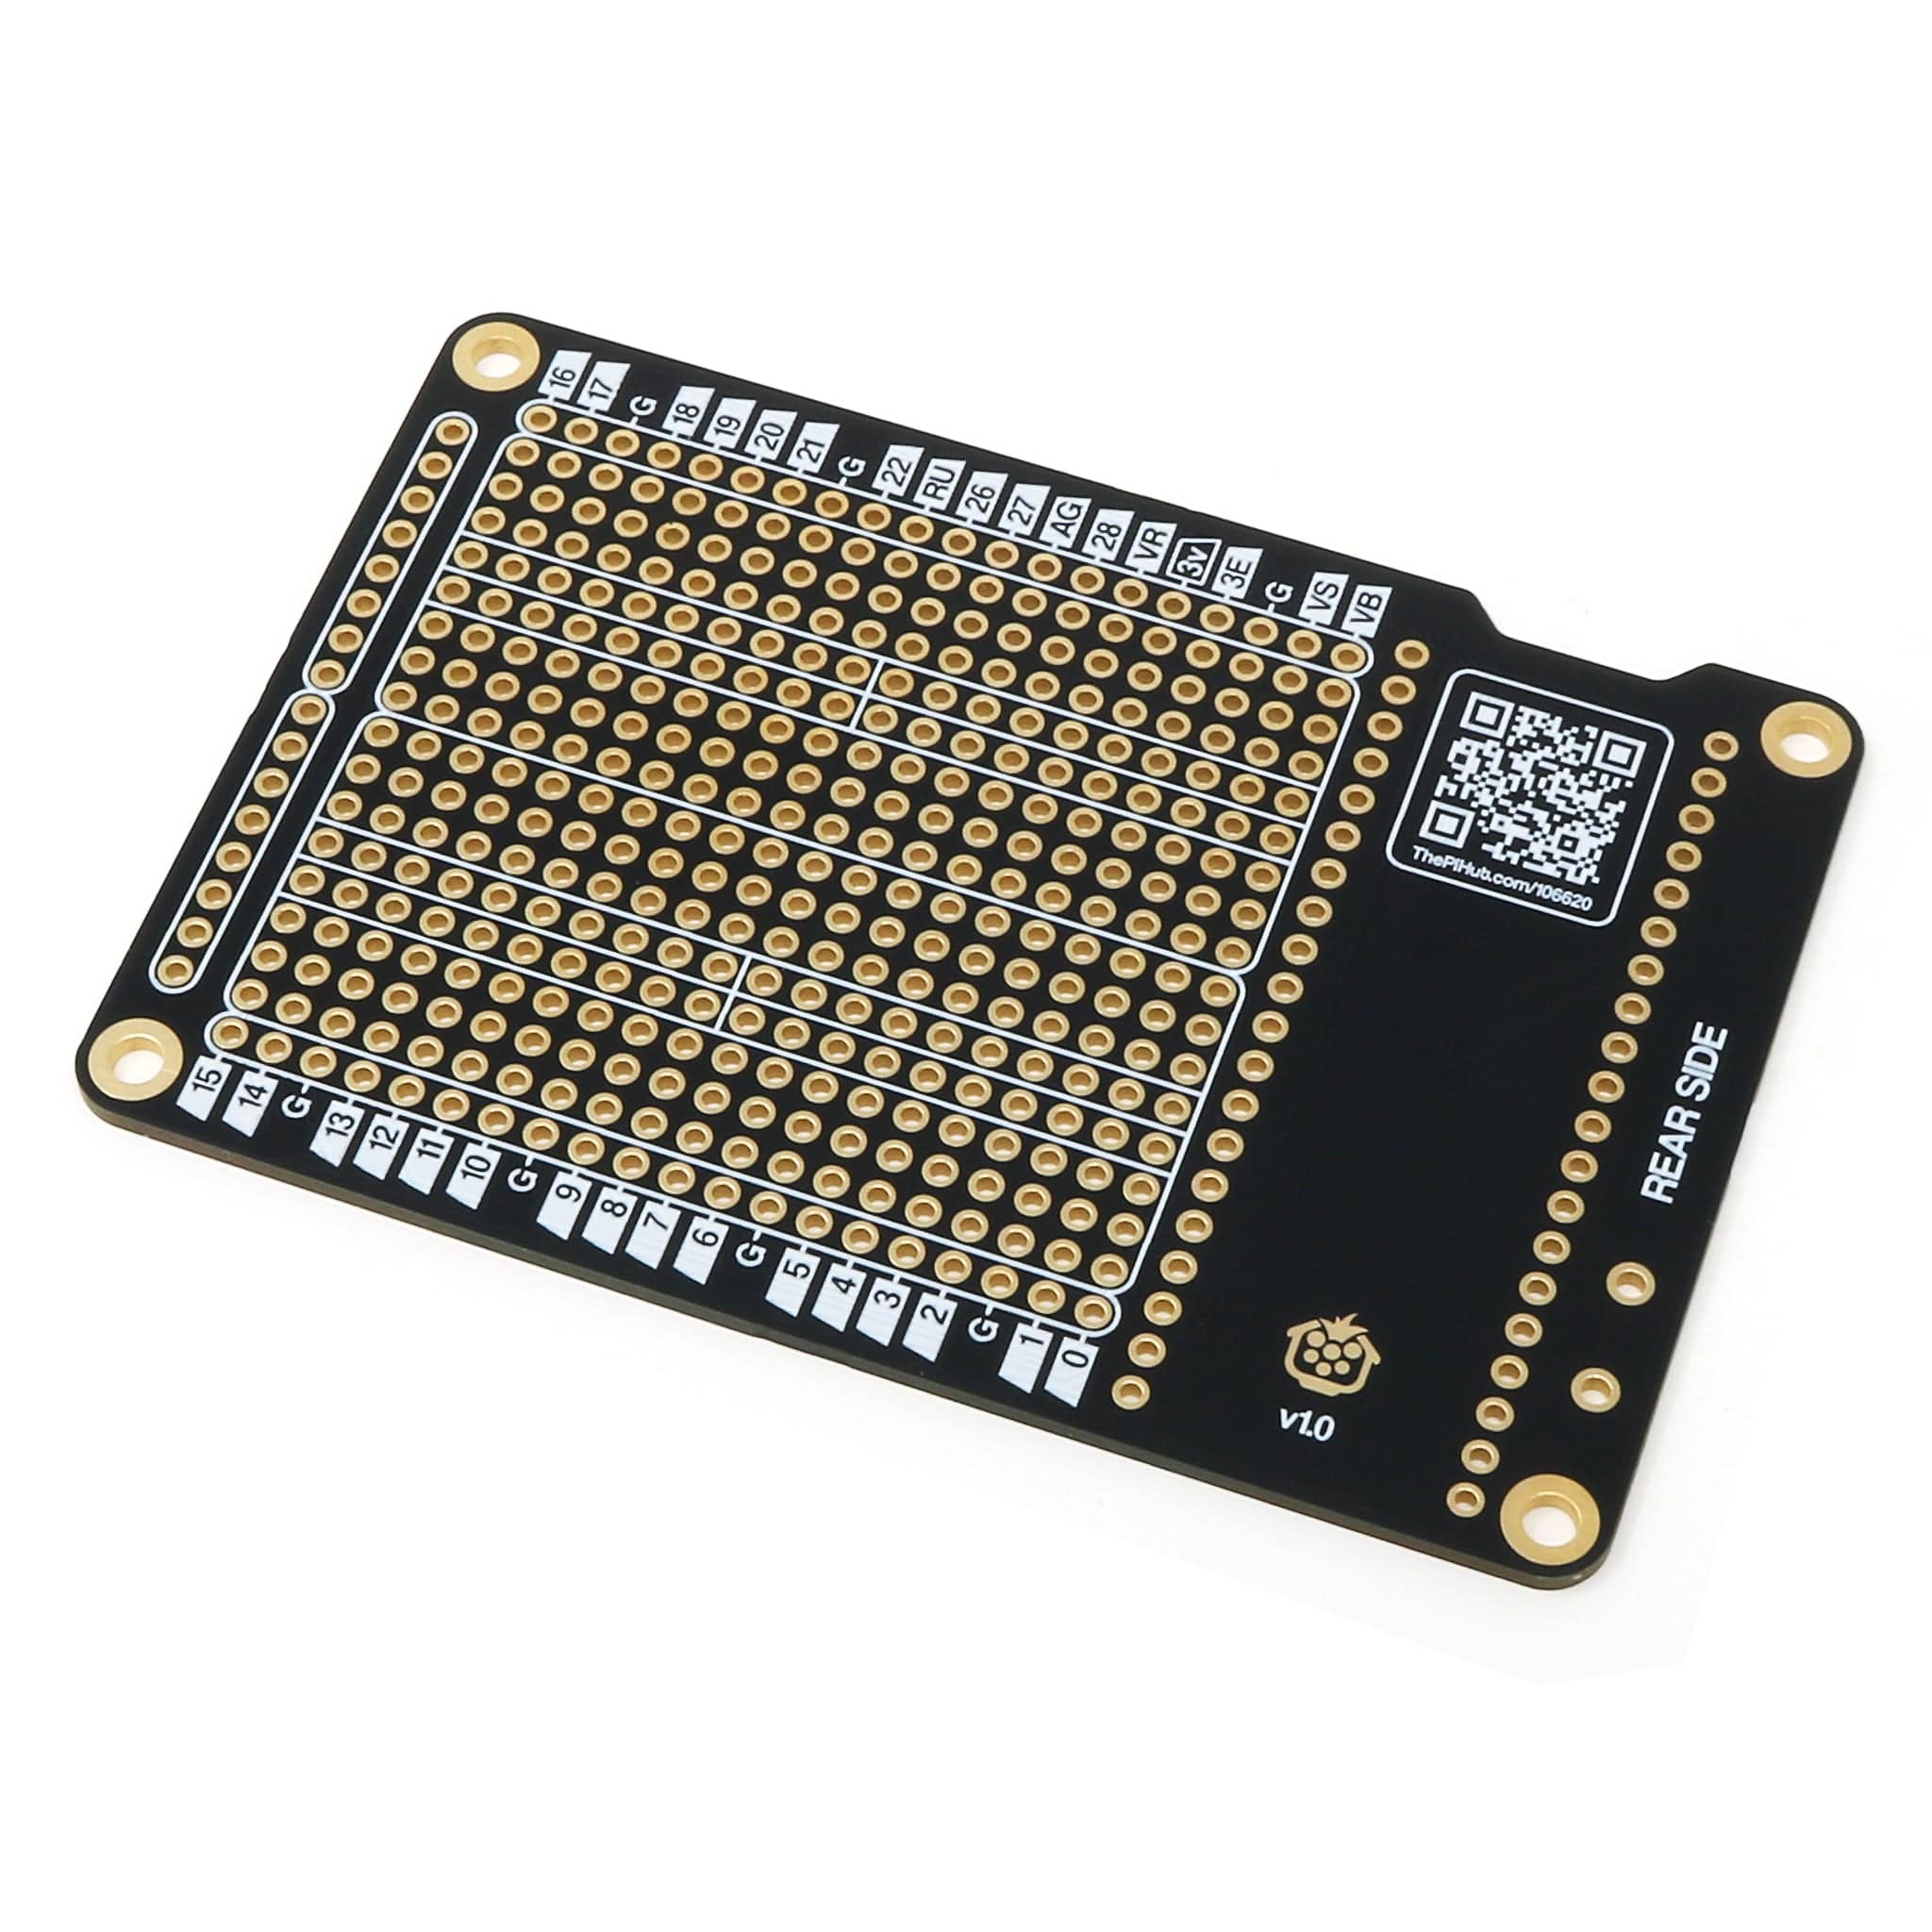
The ProtoMate has a main soldering area with two breadboard-style sections, i.e. the pads/holes are connected in lanes. Some customers prefer this style, and some prefer the disconnected, perfboard-style. If perfboard-style is more your thing, check out the PerfMate for Pico instead.
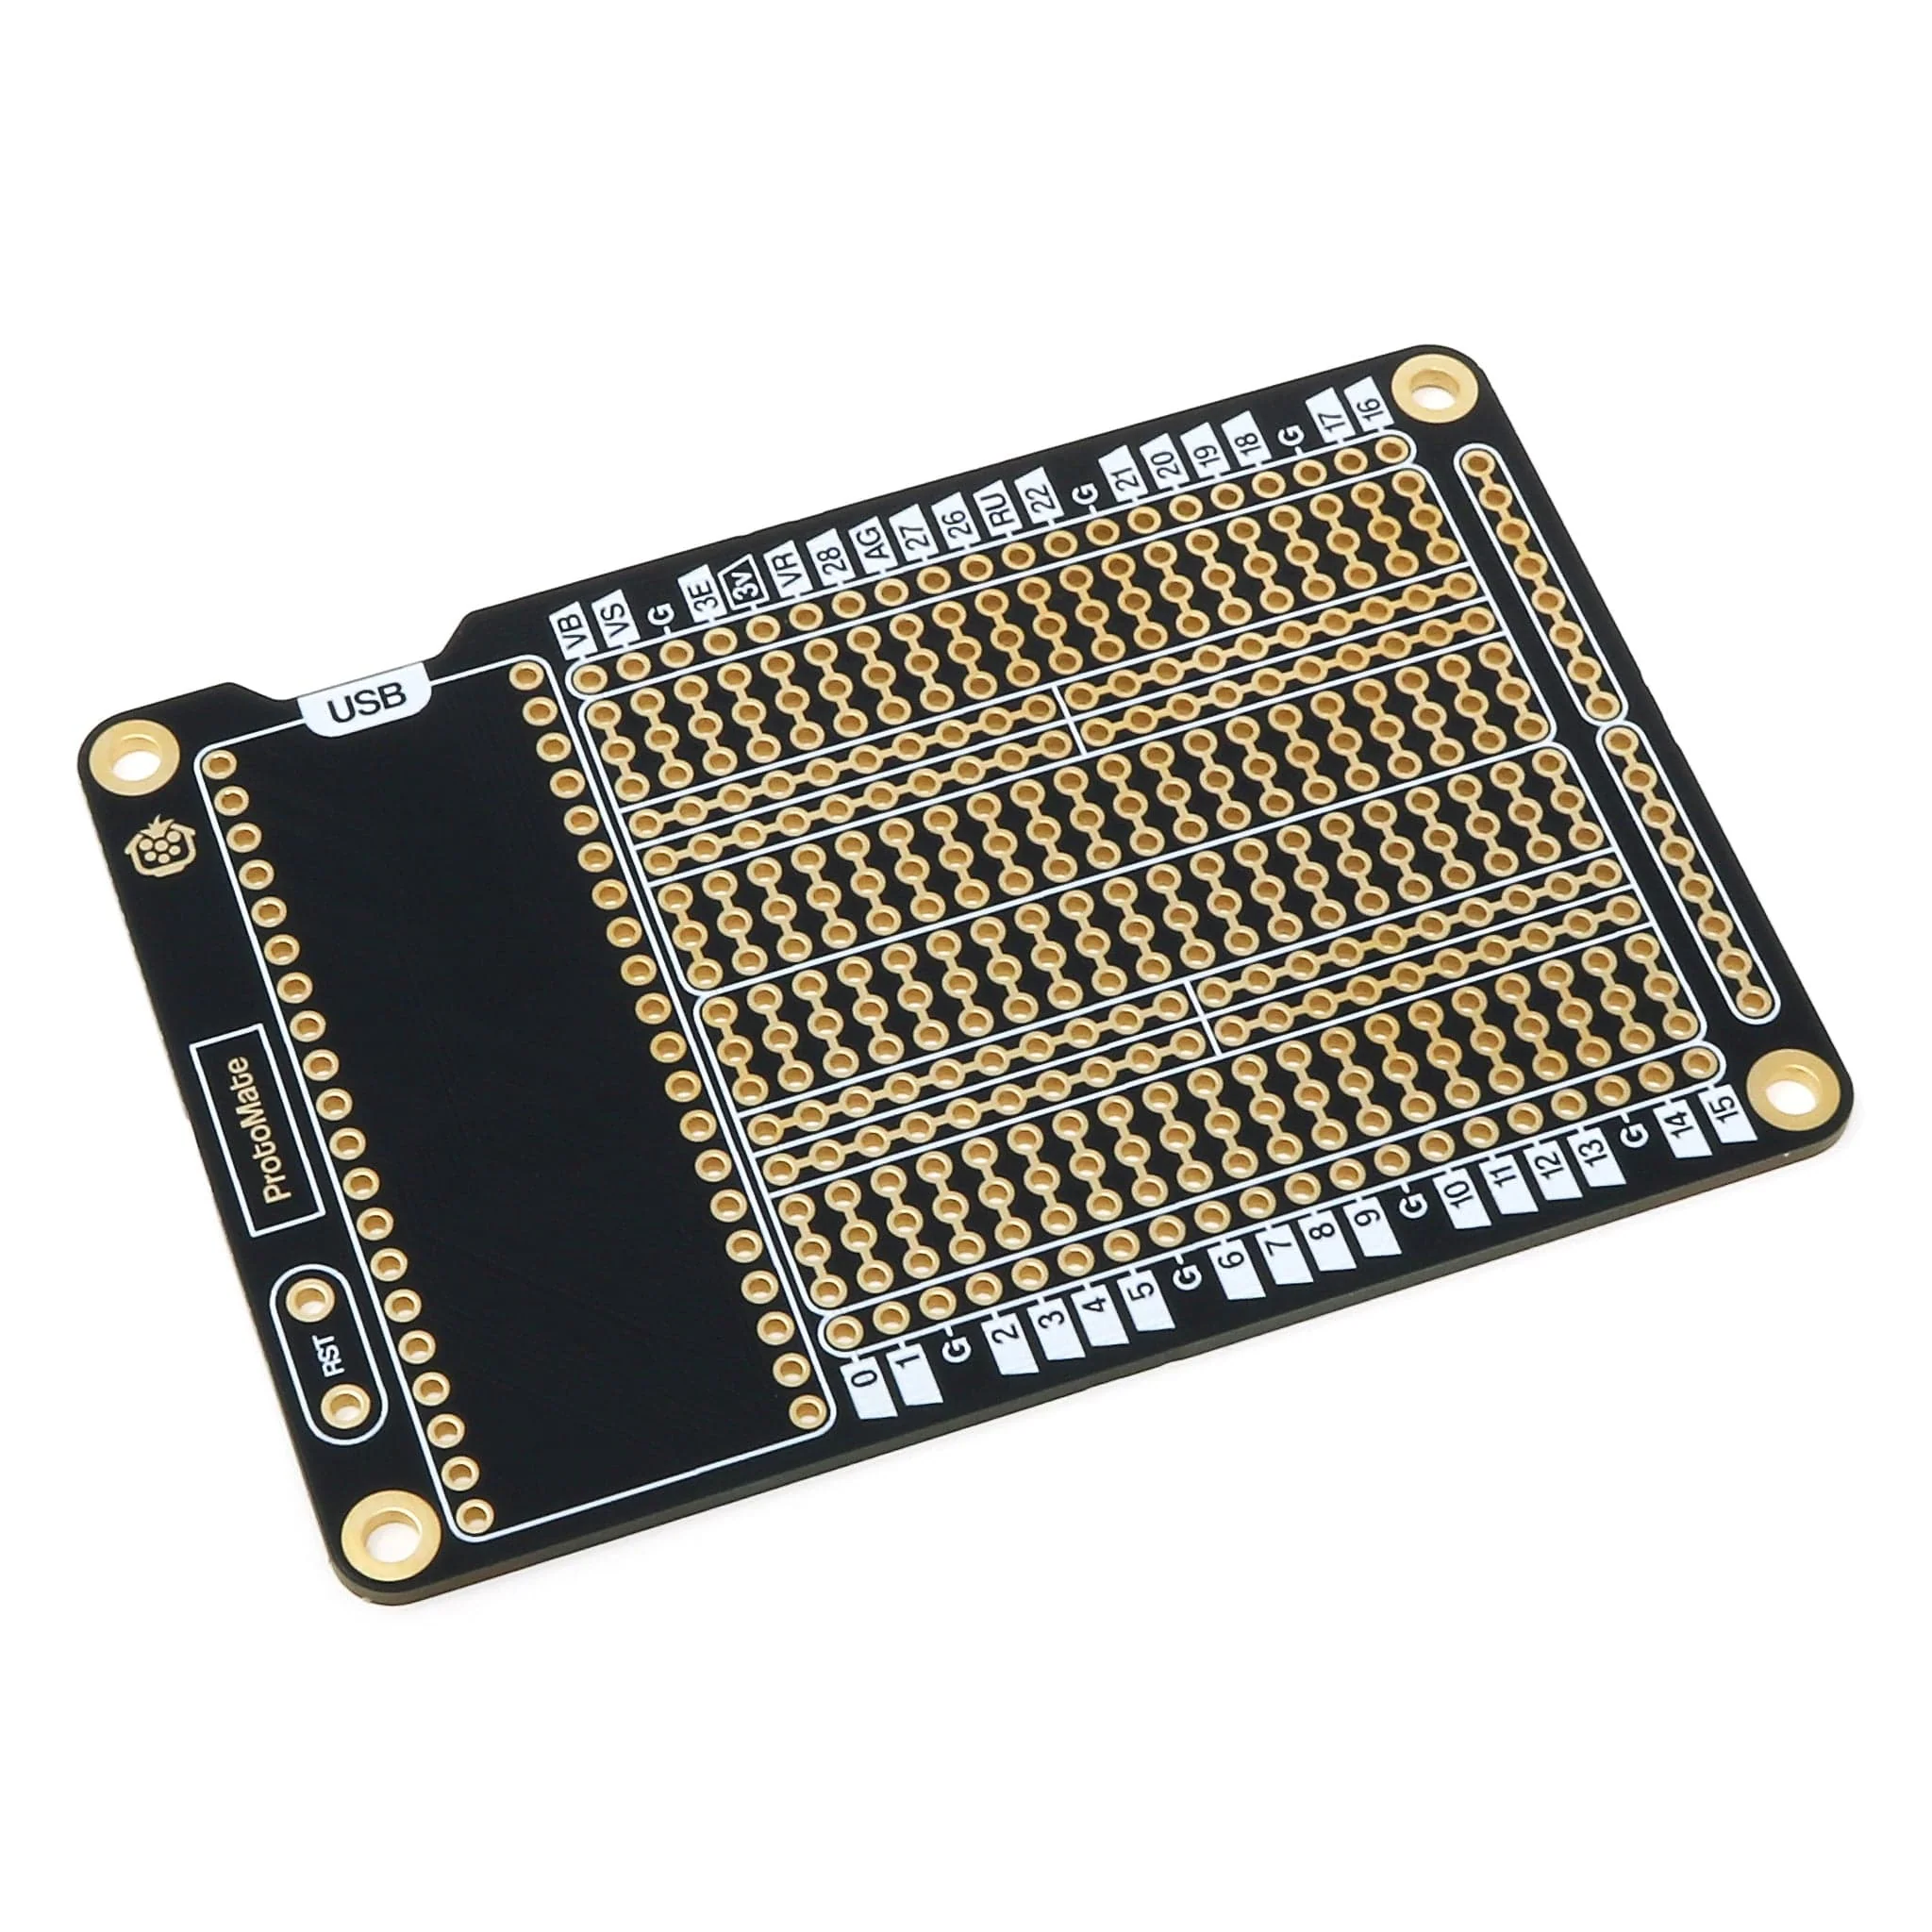
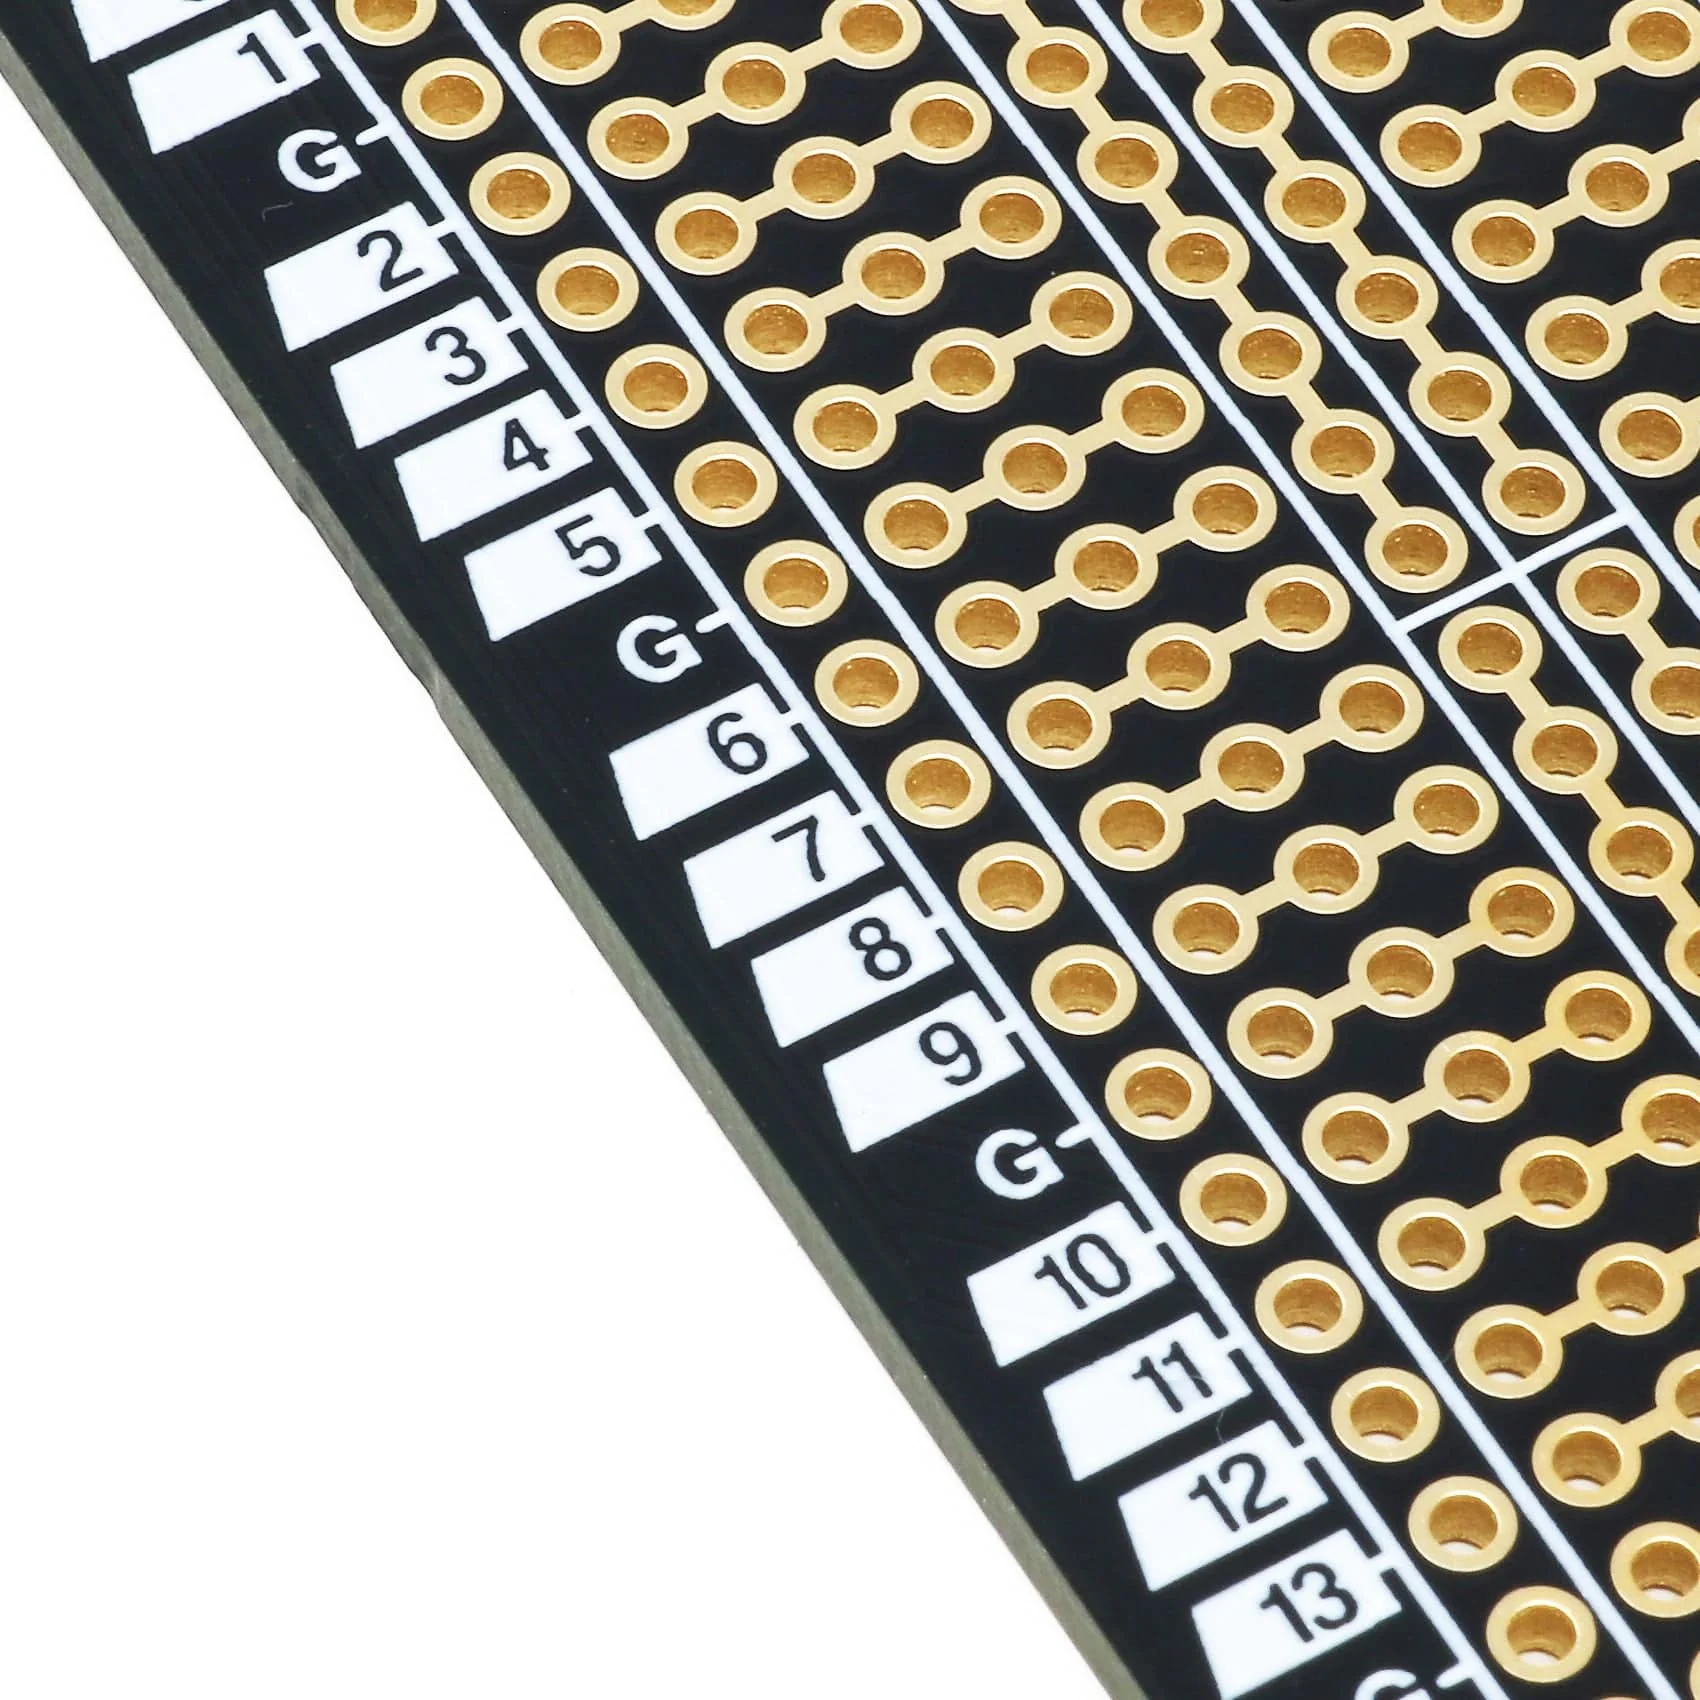
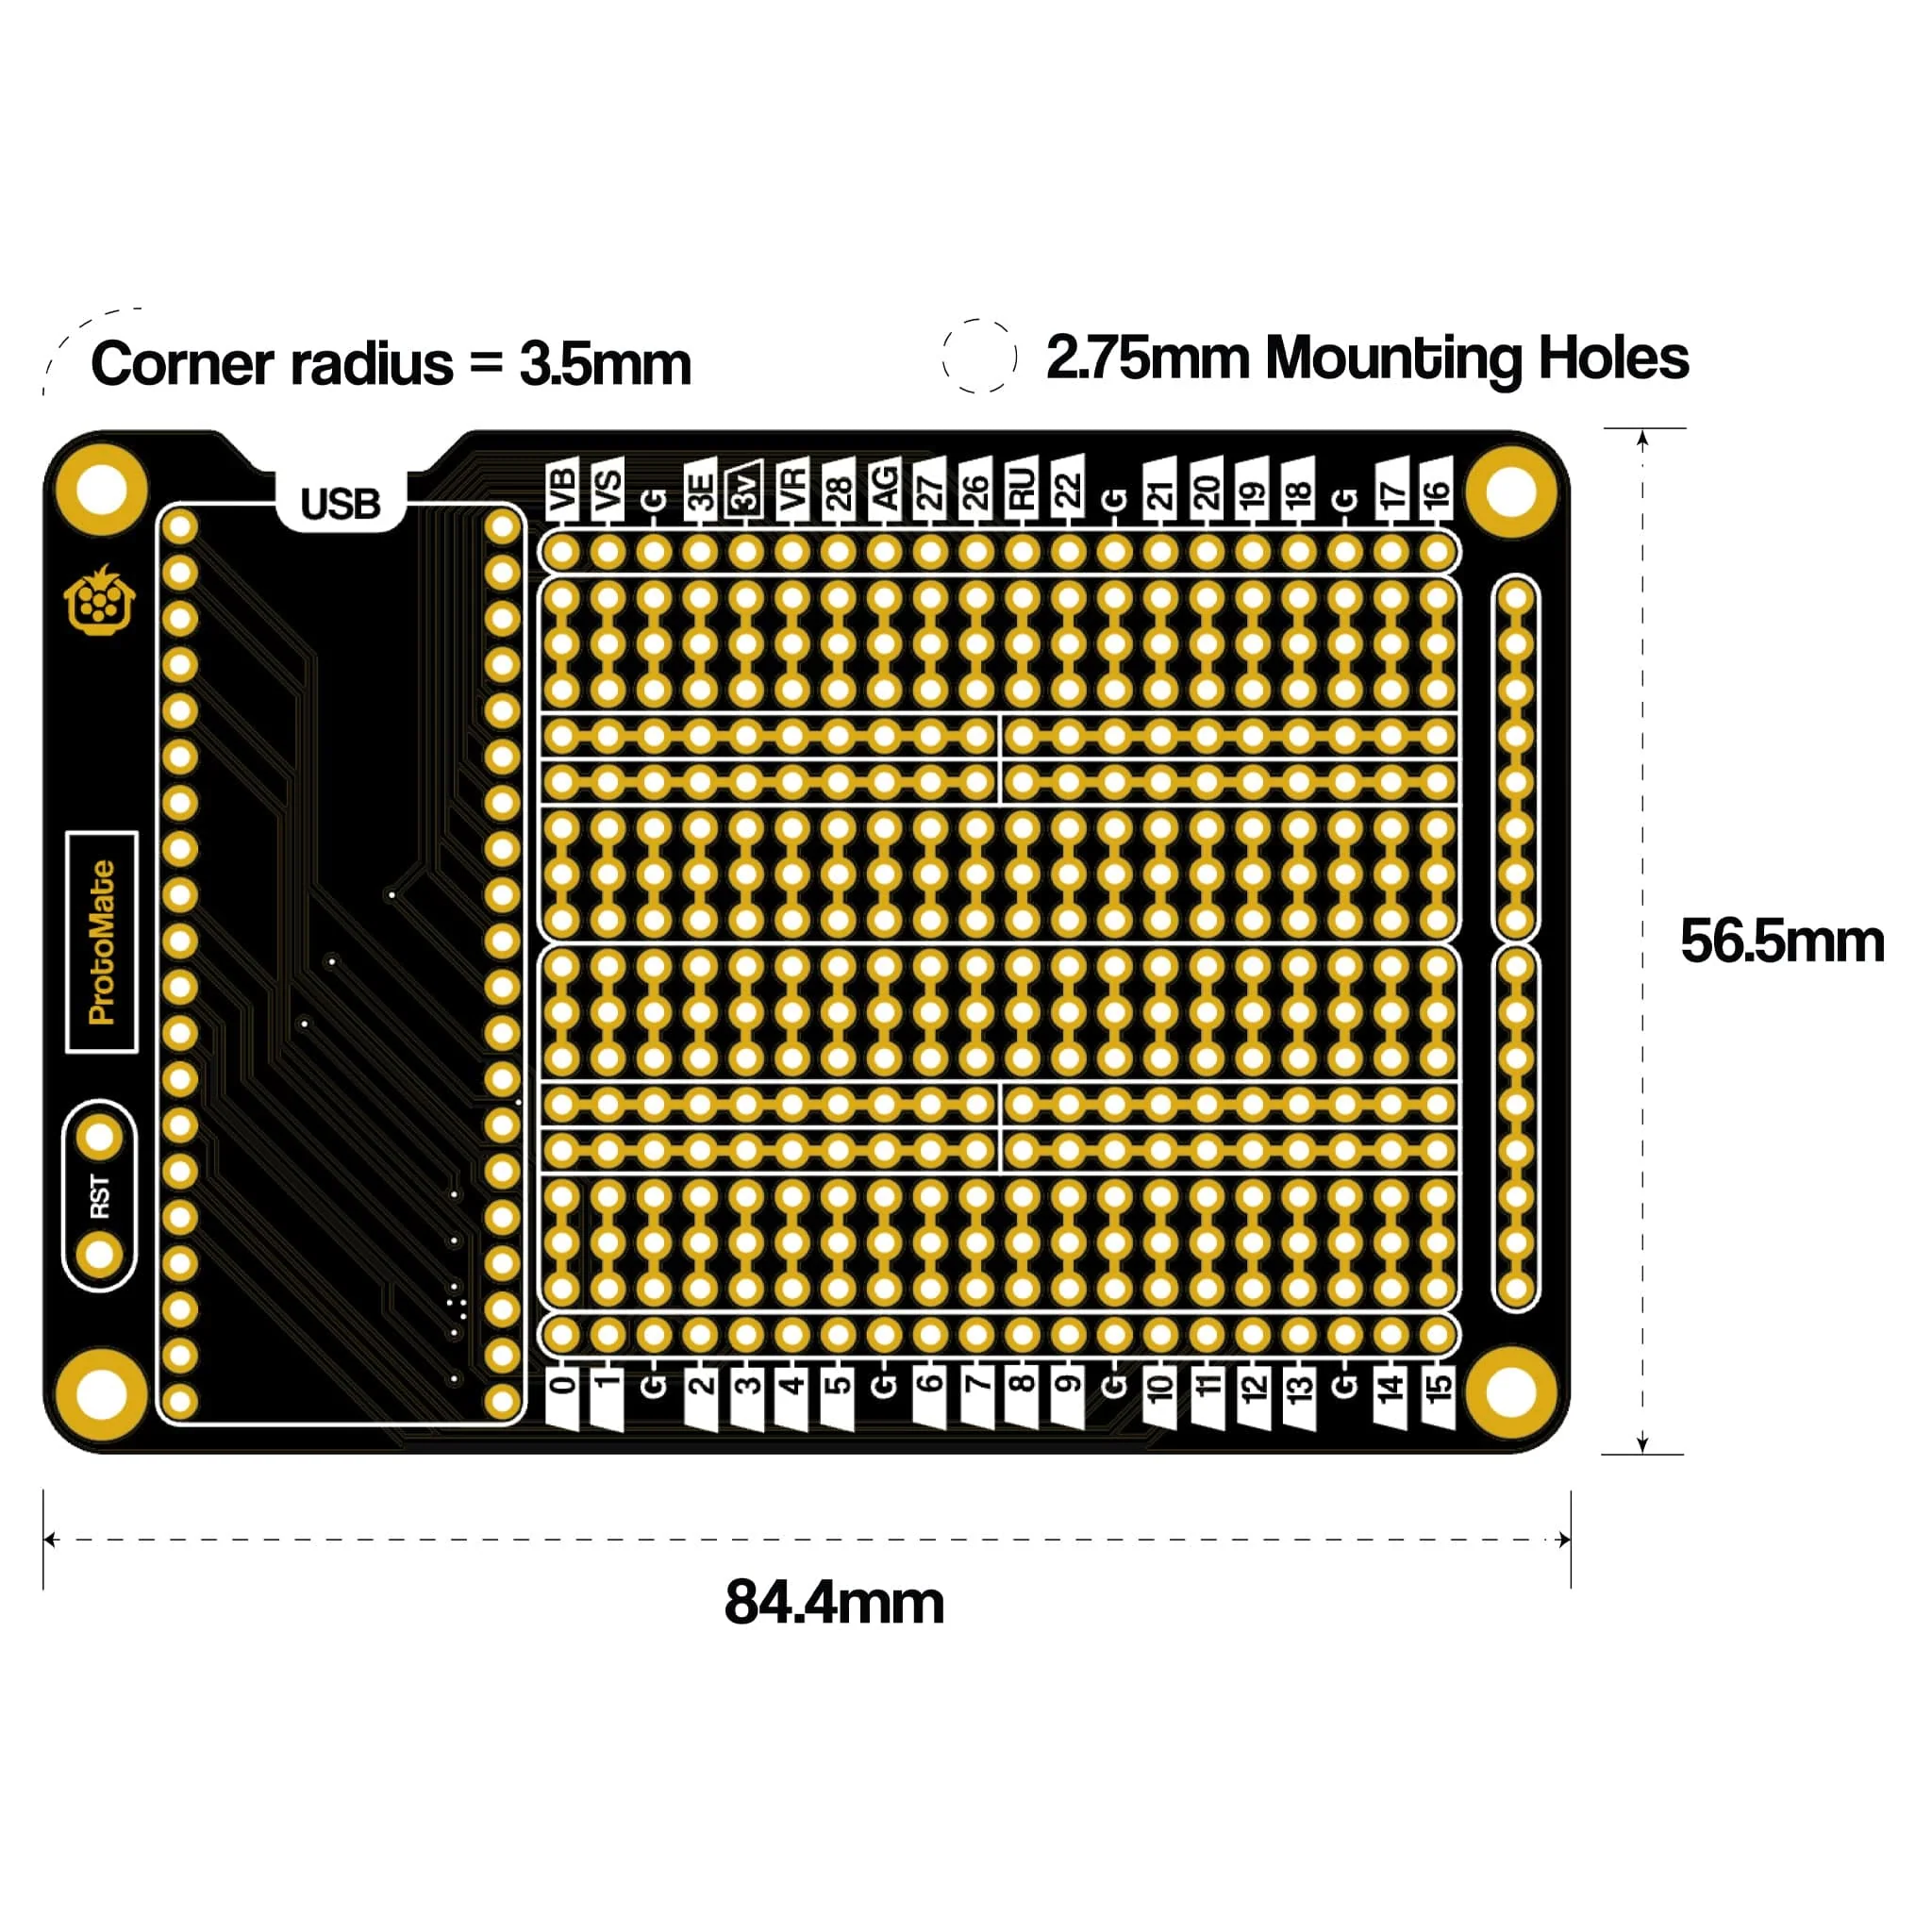
The breadboard-style soldering areas have central rail sections, split in the middle (feel free to bridge them together), and are surrounded by the Pico's GPIO, giving you easy, close access to any of the Pico's 40 GPIO pins. ProtoMate also includes rails on one side of the board, great for making banks of power pads for your project. These are connected in lanes, indicated by the gold pad bridges and white frames. You can cut the trace bridges between the rail pads if you want to disconnect them from each other.
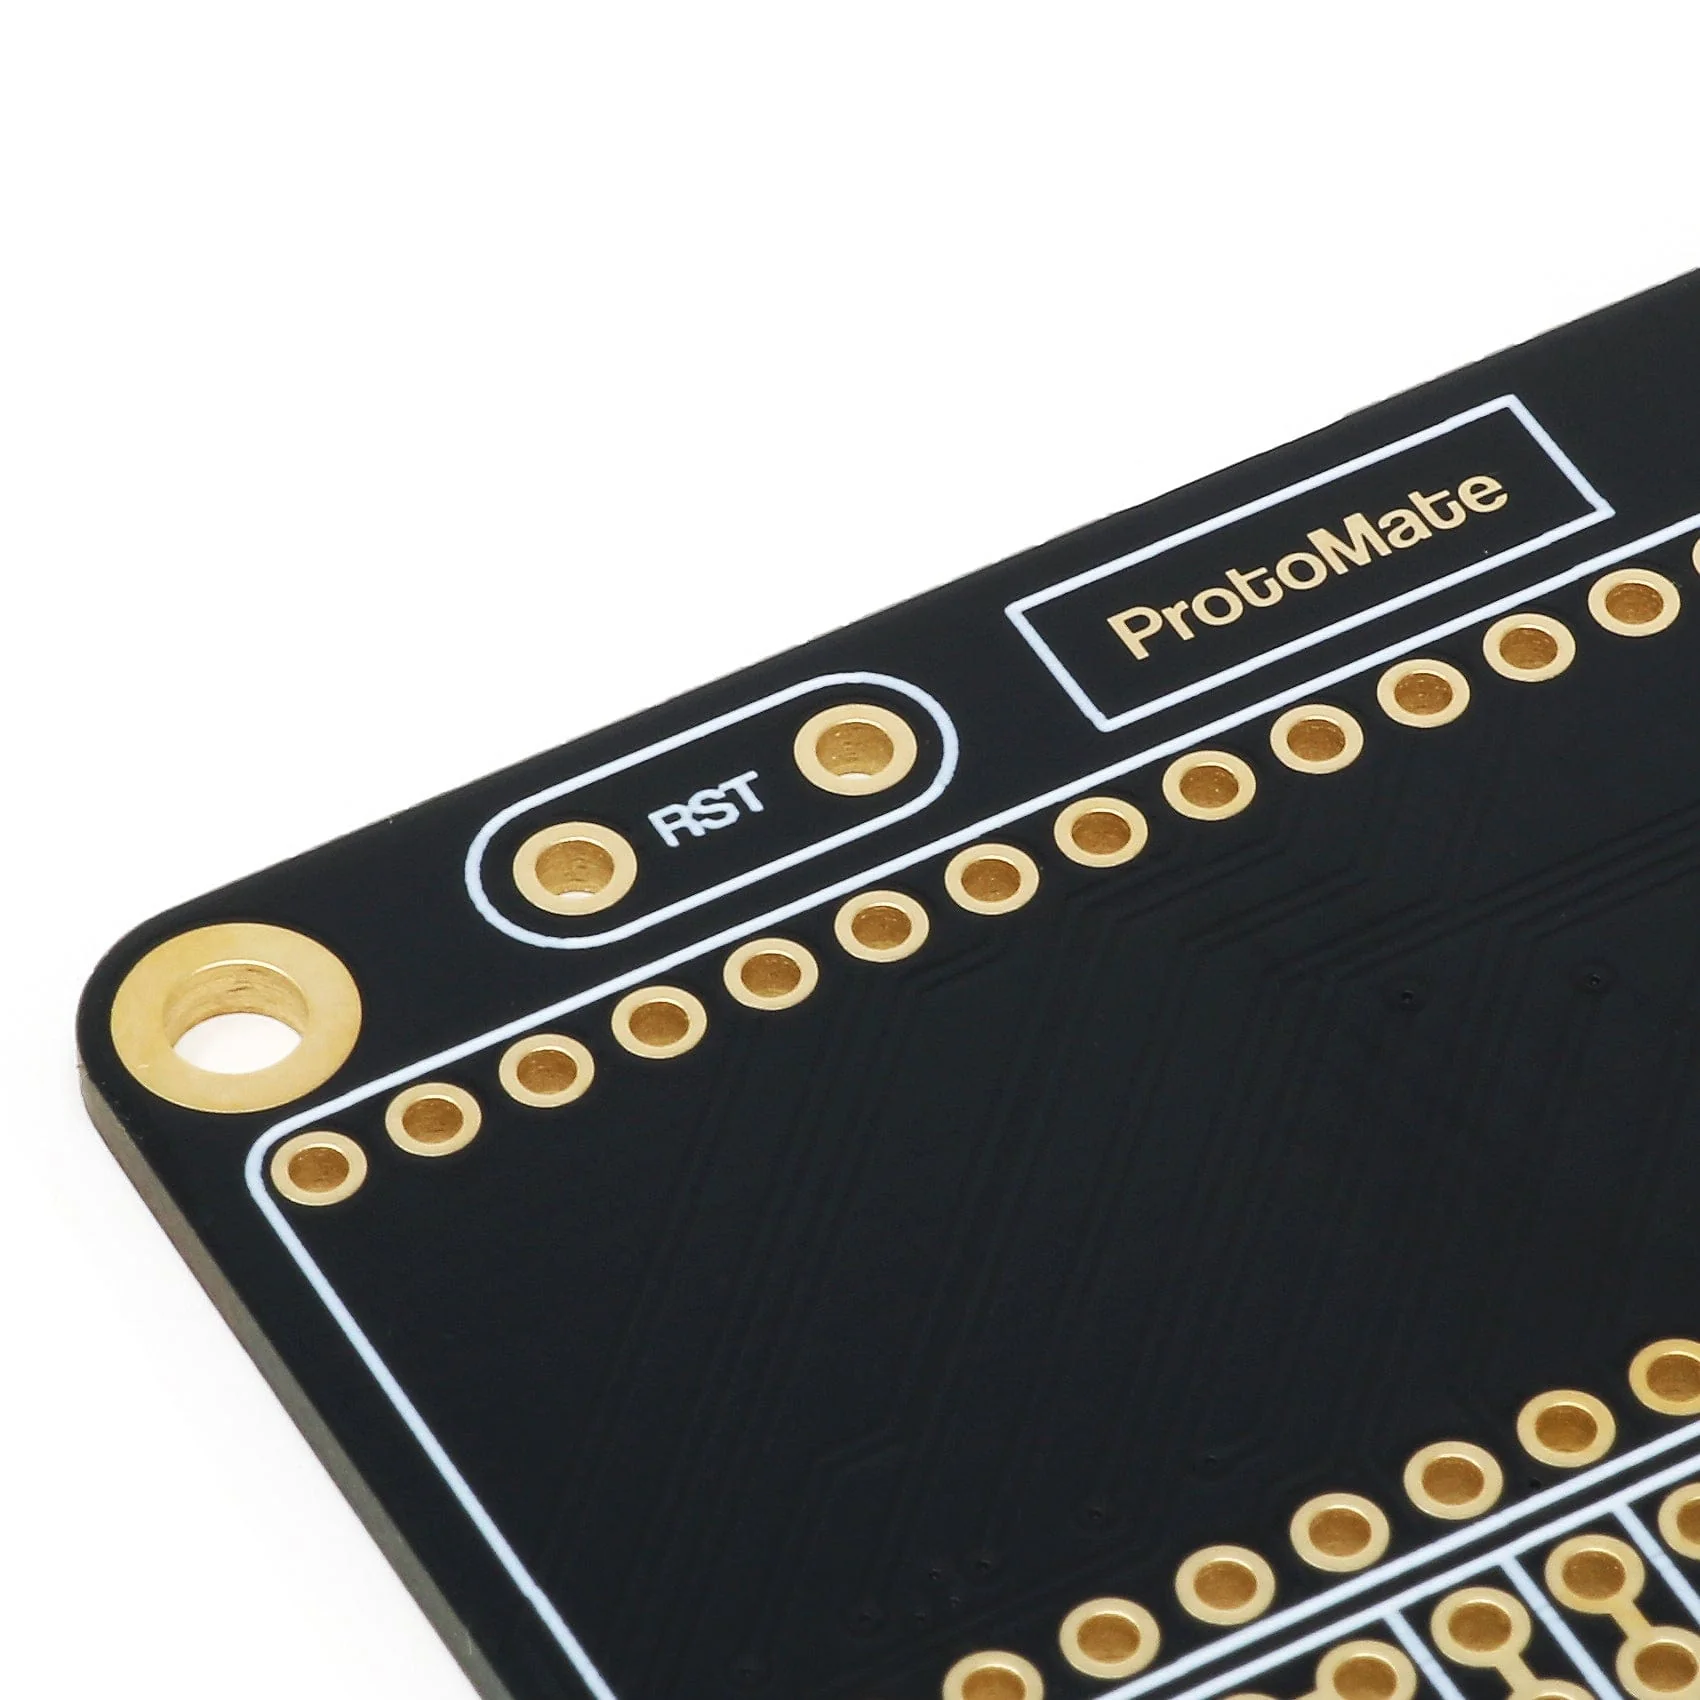
The package includes a small tactile button that you can solder to the dedicated RST pads on the left of the board, providing an easy, compact way to include a reset button in your Pico project.
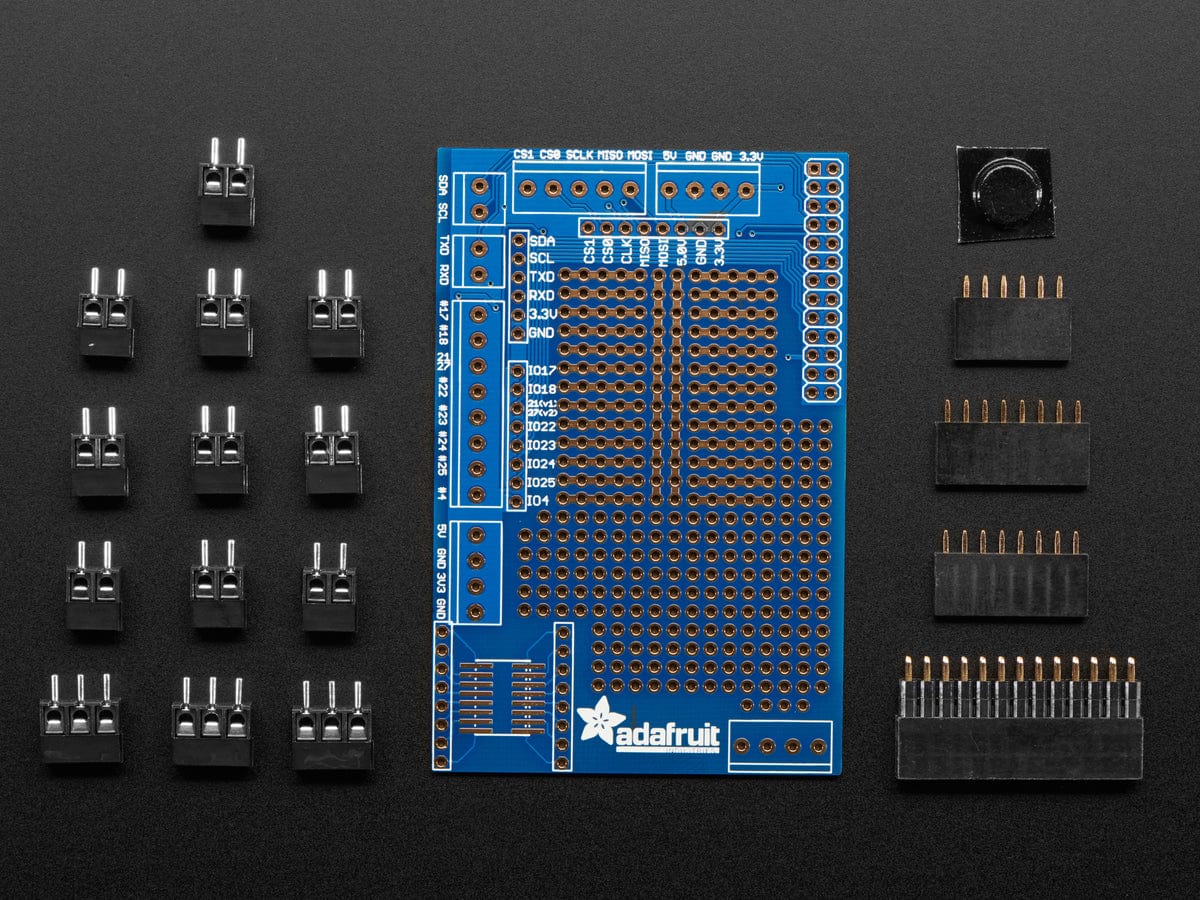
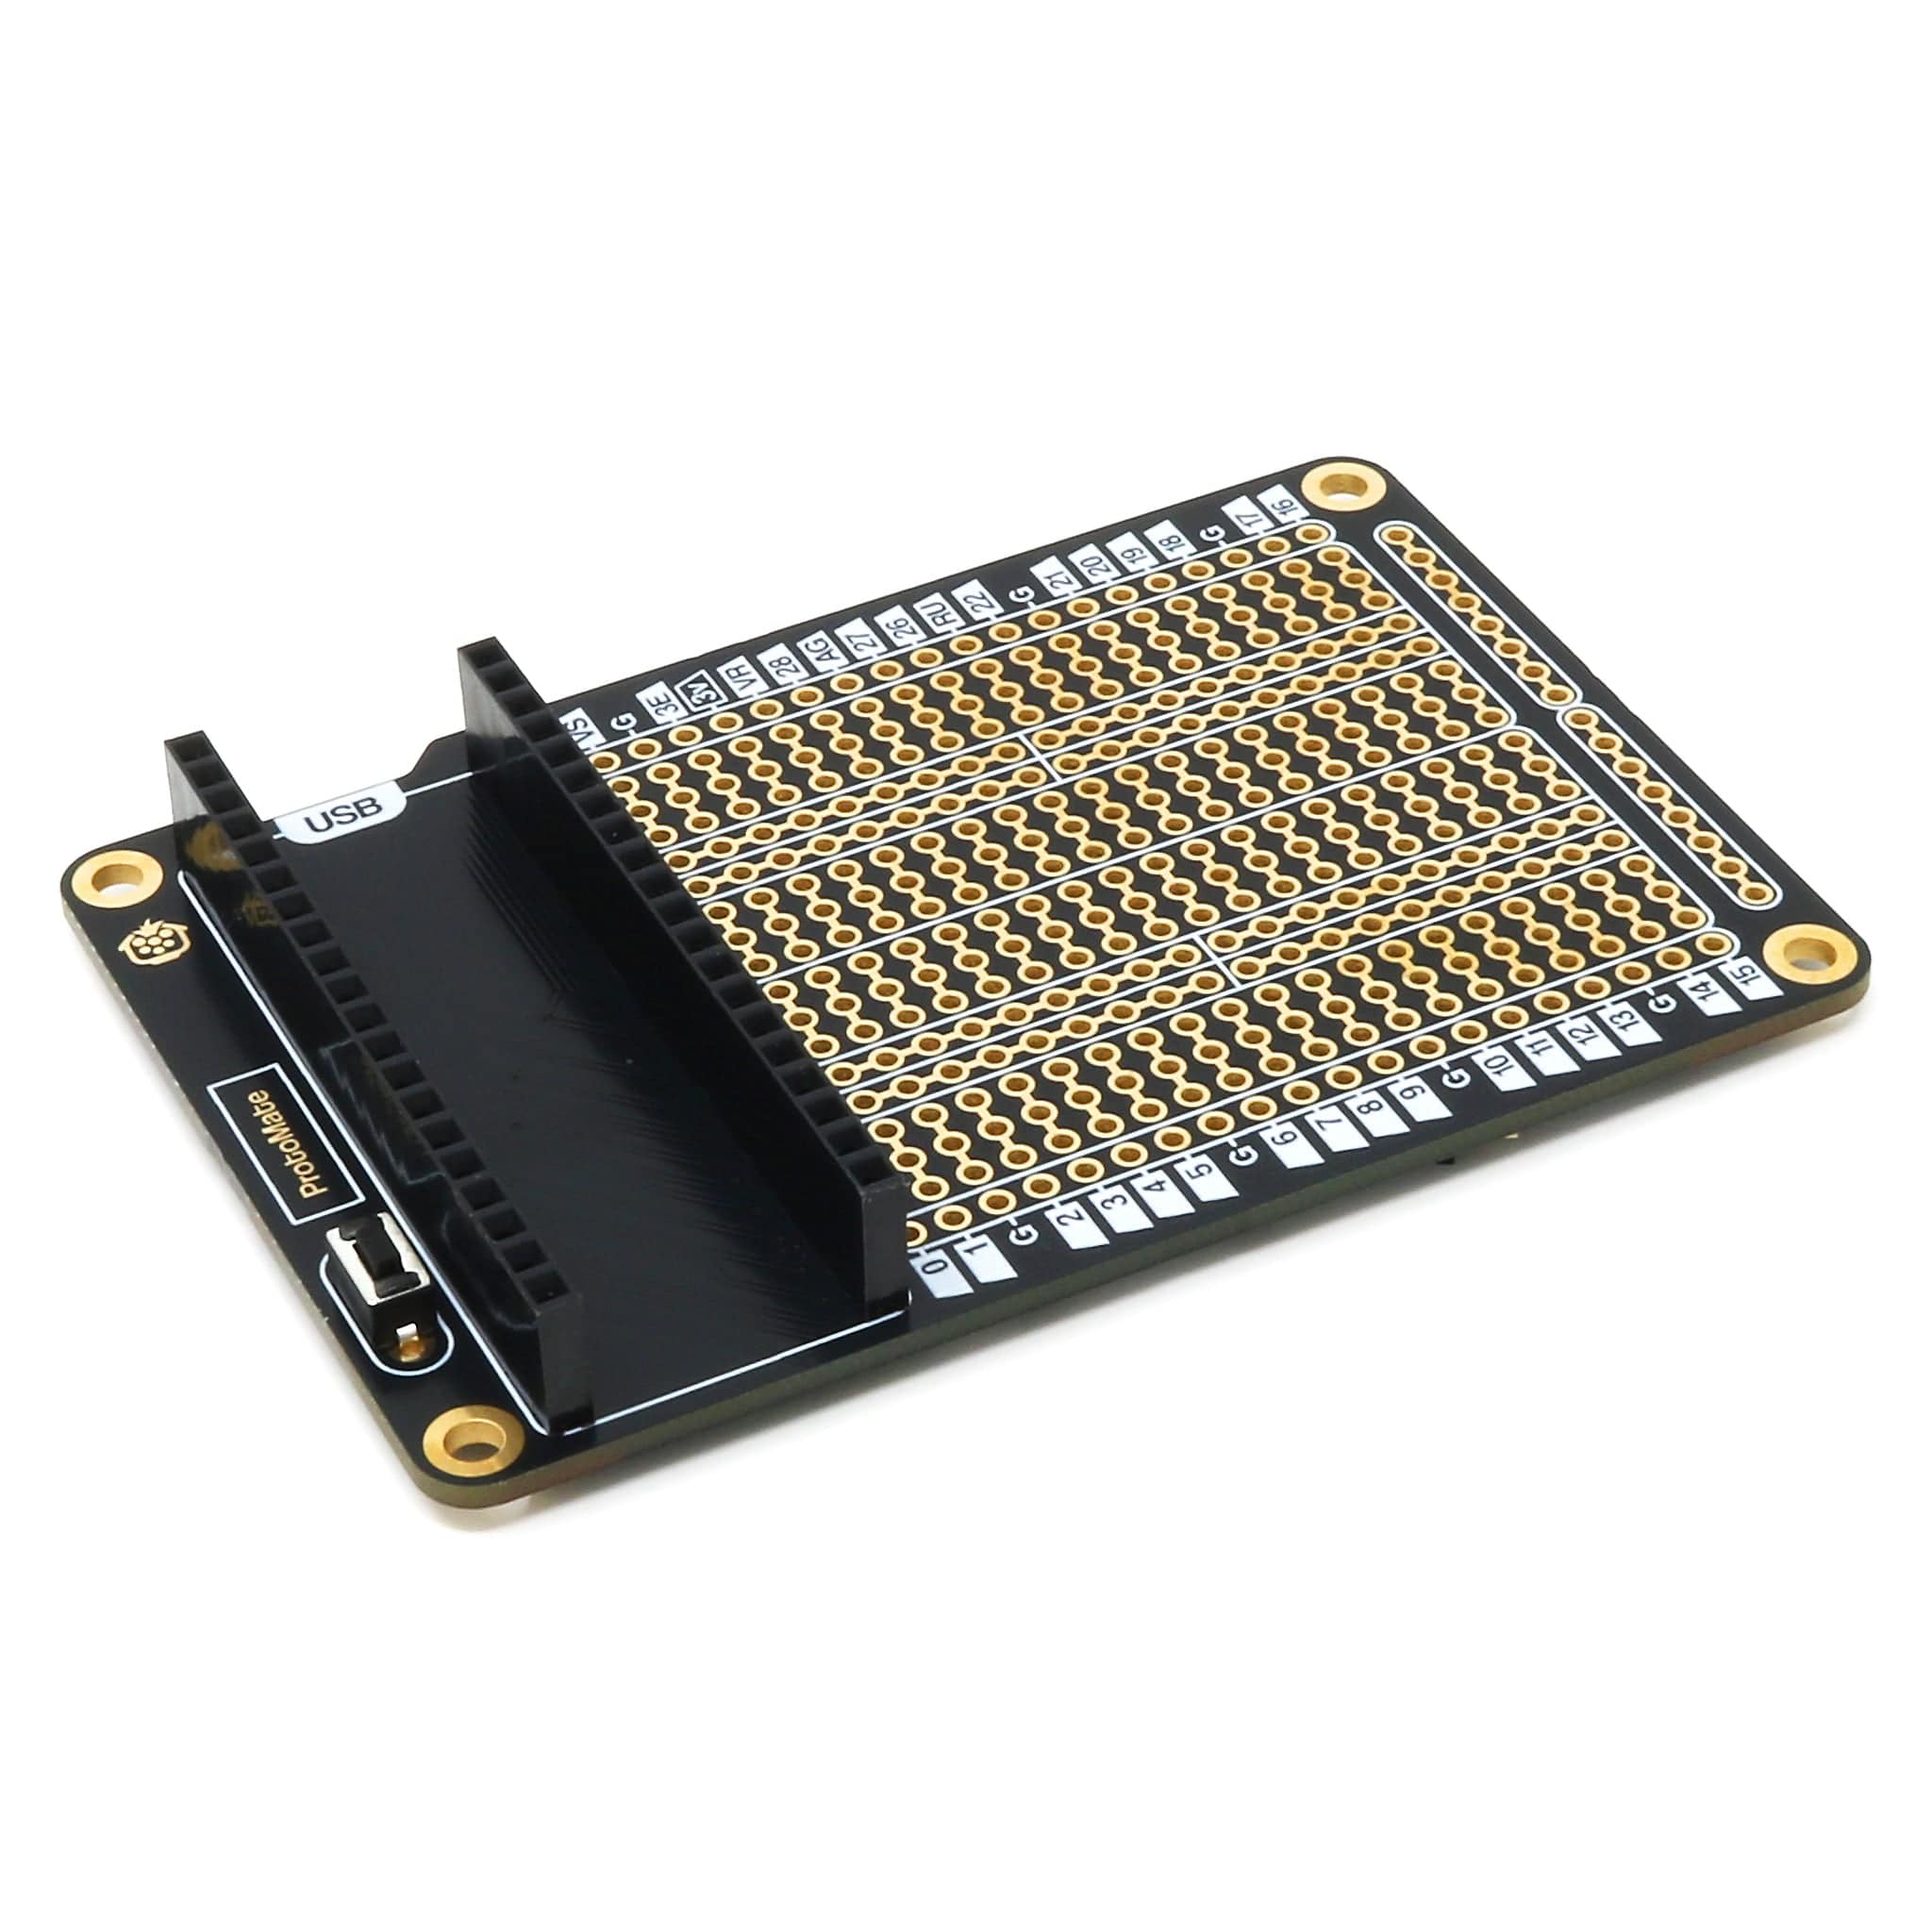
Plan your circuit and pins (then check it at least twice!), fit your components to the board, then solder them along with any prototyping wire connections. We include a set of female socket headers with the ProtoMate, to use as a socket for your Pico. We recommend soldering the headers last to make it easier to get to the components from the underside. You can also solder a Pico H directly to the board for a more compact setup.
Pico and mounting hardware (standoffs) not included.
Key Features
🐫 Dual breadboard-style soldering areas for endless prototyping
📌 All IO pins broken out
🛤️ Rails to make banks for regularly used pins (such as 5V/GND)
👇 Reset button included to solder to the dedicated RST pads
🪙 ENIG (Gold) PCB plating for oxidation resistance and durability
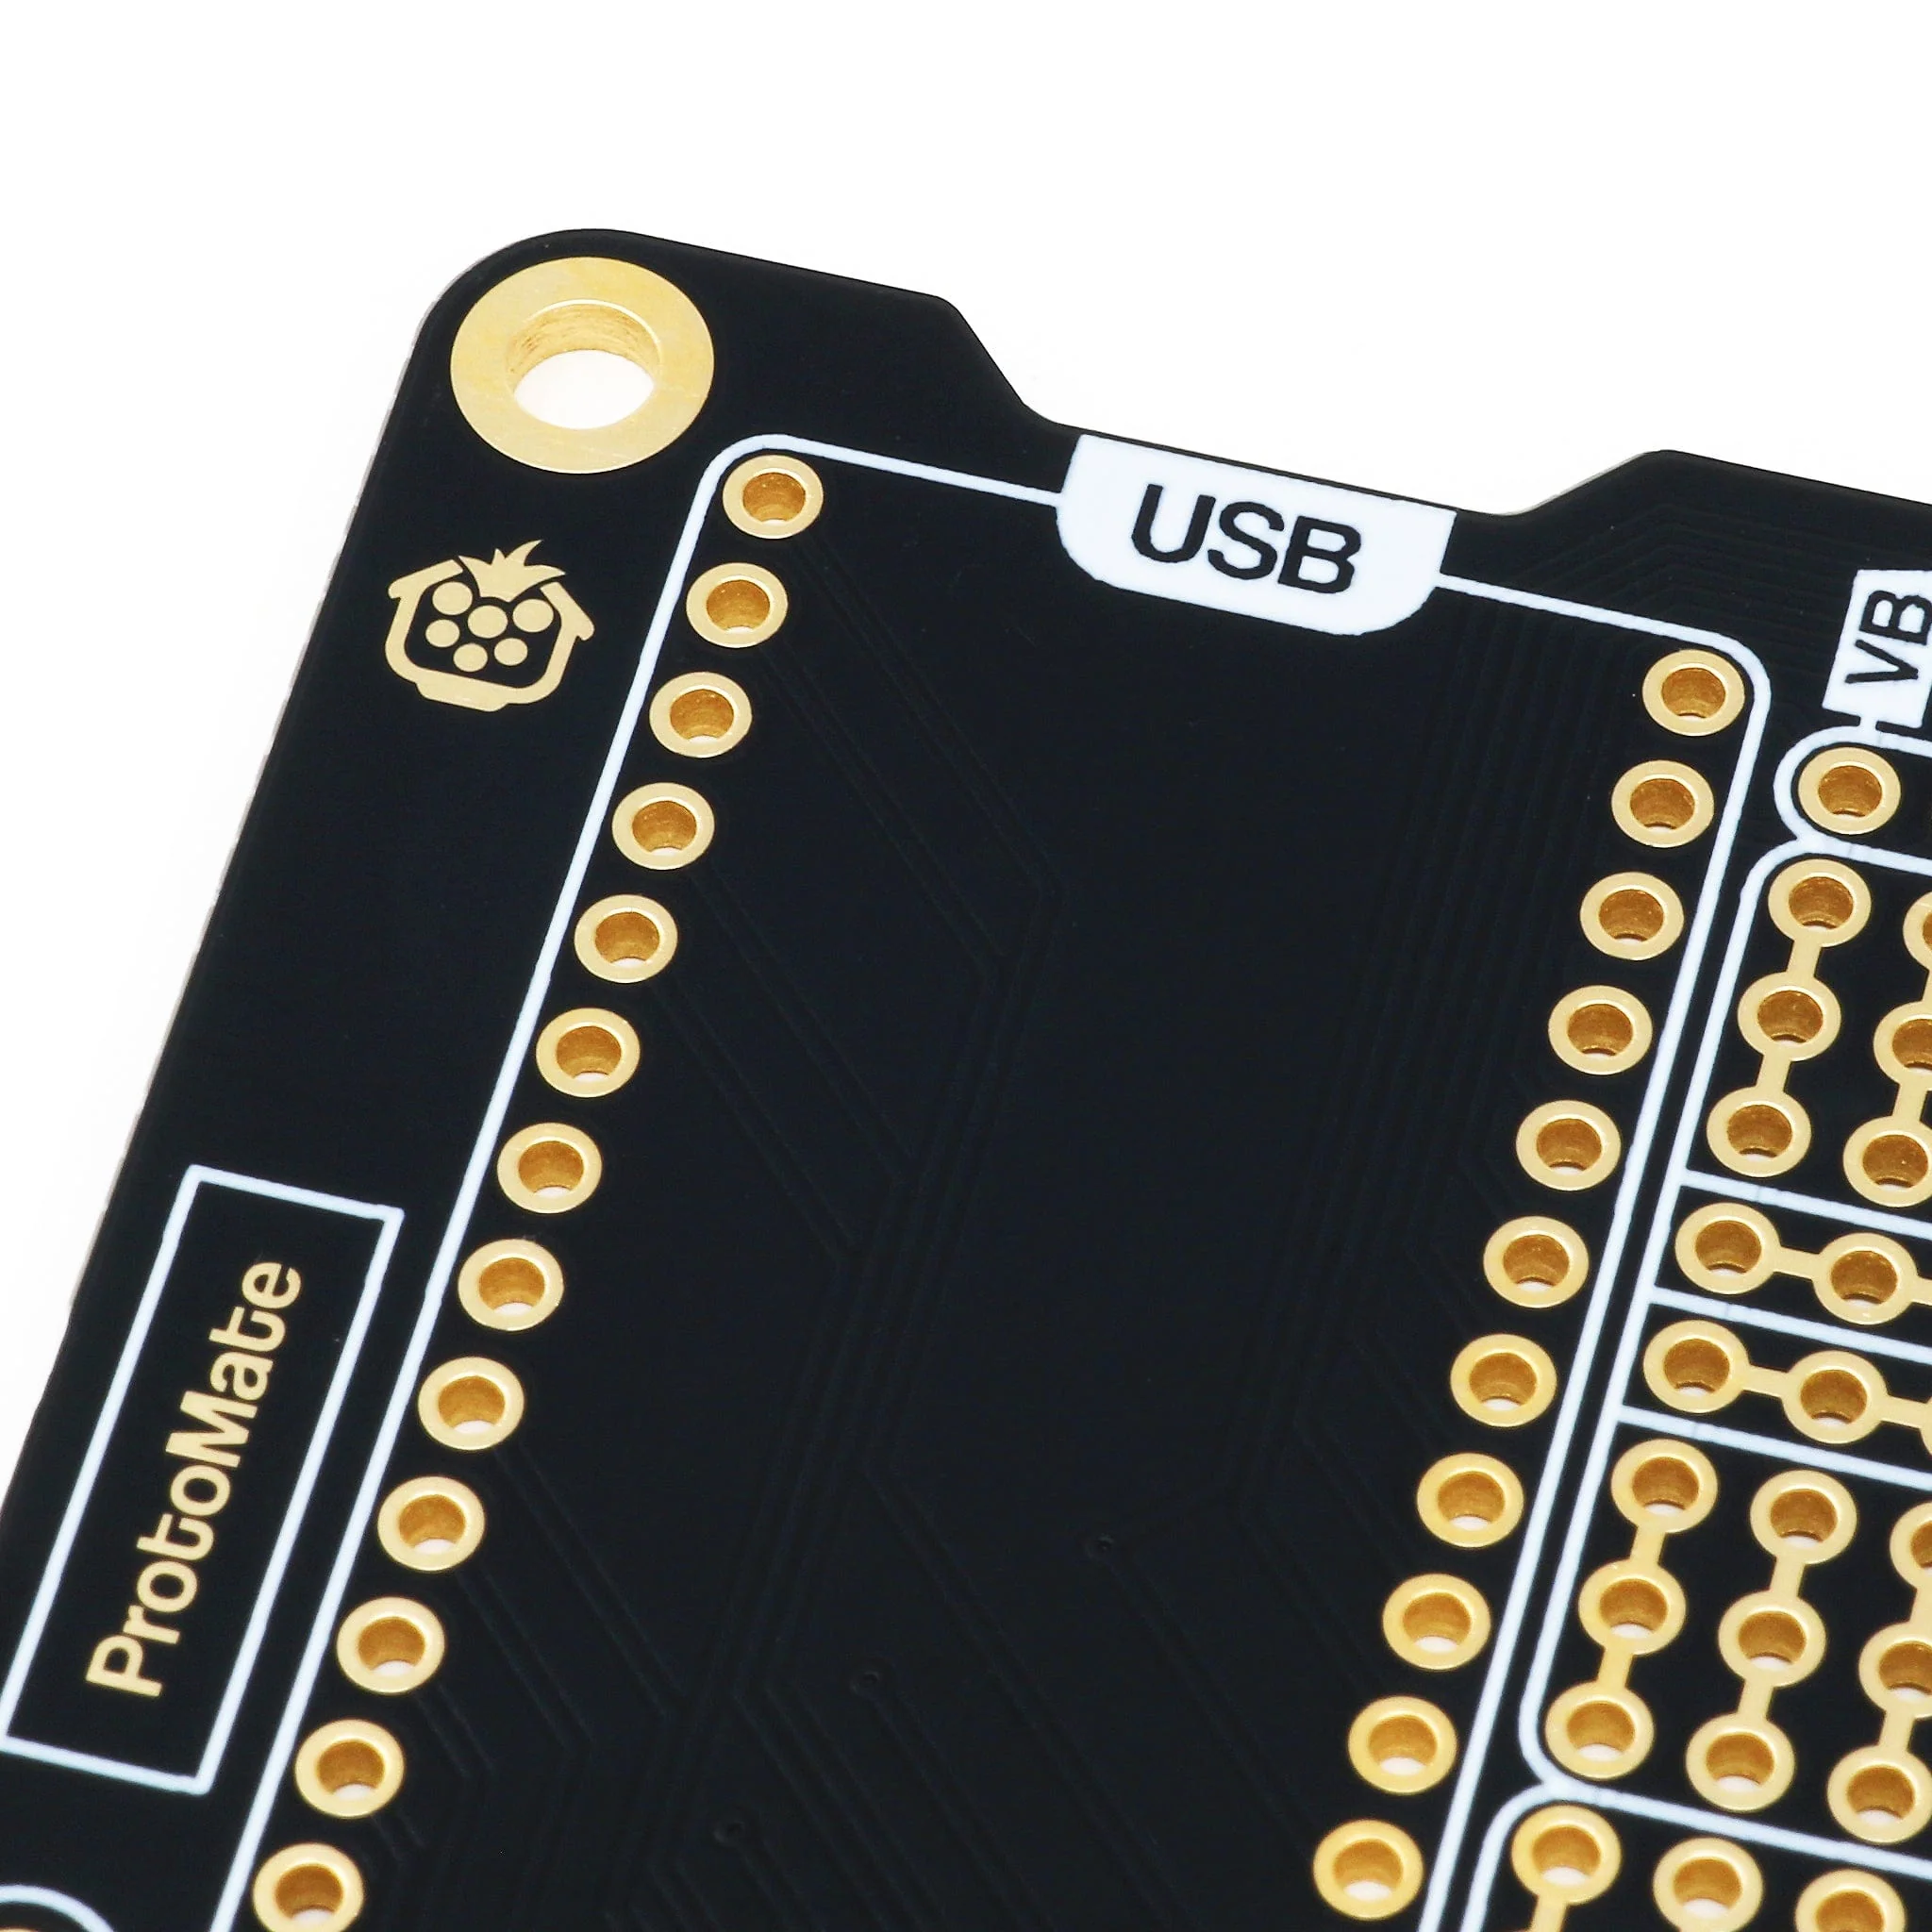
↕️ A big ol' REAR SIDE label to remind you which way up to solder the board
🔩 M2.5 mounting holes because M2 is just silly
💸 2x 20-pin Socket headers included!
Board Layout
 Resources
- Assembly Guide
- A4 Printable Planning Sheet
- STEP file (PCB)
Dimensions
 Package Contents
- 1x ProtoMate for Pico
- 2x 20-pin female headers
- 1x Tactile button
Pico and mounting hardware (standoffs) not included.
Product Information
Product Information
Shipping & Returns
Shipping & Returns
Description
ProtoMate for Pico is a breadboard-style prototyping board designed for Raspberry Pi Pico (not included), designed to give you an easy way to make projects more permanent and reliable, moving from loose jumper wires and breadboards to a proper soldered PCB!
The ProtoMate has a main soldering area with two breadboard-style sections, i.e. the pads/holes are connected in lanes. Some customers prefer this style, and some prefer the disconnected, perfboard-style. If perfboard-style is more your thing, check out the PerfMate for Pico instead.
The breadboard-style soldering areas have central rail sections, split in the middle (feel free to bridge them together), and are surrounded by the Pico's GPIO, giving you easy, close access to any of the Pico's 40 GPIO pins. ProtoMate also includes rails on one side of the board, great for making banks of power pads for your project. These are connected in lanes, indicated by the gold pad bridges and white frames. You can cut the trace bridges between the rail pads if you want to disconnect them from each other.
The package includes a small tactile button that you can solder to the dedicated RST pads on the left of the board, providing an easy, compact way to include a reset button in your Pico project.
Plan your circuit and pins (then check it at least twice!), fit your components to the board, then solder them along with any prototyping wire connections. We include a set of female socket headers with the ProtoMate, to use as a socket for your Pico. We recommend soldering the headers last to make it easier to get to the components from the underside. You can also solder a Pico H directly to the board for a more compact setup.
Pico and mounting hardware (standoffs) not included.
Key Features
🐫 Dual breadboard-style soldering areas for endless prototyping
📌 All IO pins broken out
🛤️ Rails to make banks for regularly used pins (such as 5V/GND)
👇 Reset button included to solder to the dedicated RST pads
🪙 ENIG (Gold) PCB plating for oxidation resistance and durability
↕️ A big ol' REAR SIDE label to remind you which way up to solder the board
🔩 M2.5 mounting holes because M2 is just silly
💸 2x 20-pin Socket headers included!
Board Layout
Resources
- Assembly Guide
- A4 Printable Planning Sheet
- STEP file (PCB)
Dimensions
Package Contents
- 1x ProtoMate for Pico
- 2x 20-pin female headers
- 1x Tactile button
Pico and mounting hardware (standoffs) not included.